My Projects
The My Projects section is the central hub where you can manage all your annotation projects on the TagOn platform. This comprehensive workspace allows you to view, search, filter, and interact with projects at different stages of their lifecycle. Whether you're actively working on projects, waiting for approval, or reviewing test results, the My Projects section provides all the tools you need to efficiently manage your annotation work.
Overview
The My Projects screen is organized into two main sections:
- Ongoing Projects: Projects that have been approved and are currently active for labeling or reviewing
- Registered Projects: Projects you have registered for but are still in the approval or testing phase
Additionally, the interface offers two viewing modes to suit your preferences:
- Card Type: Displays projects as visual cards with images and key information
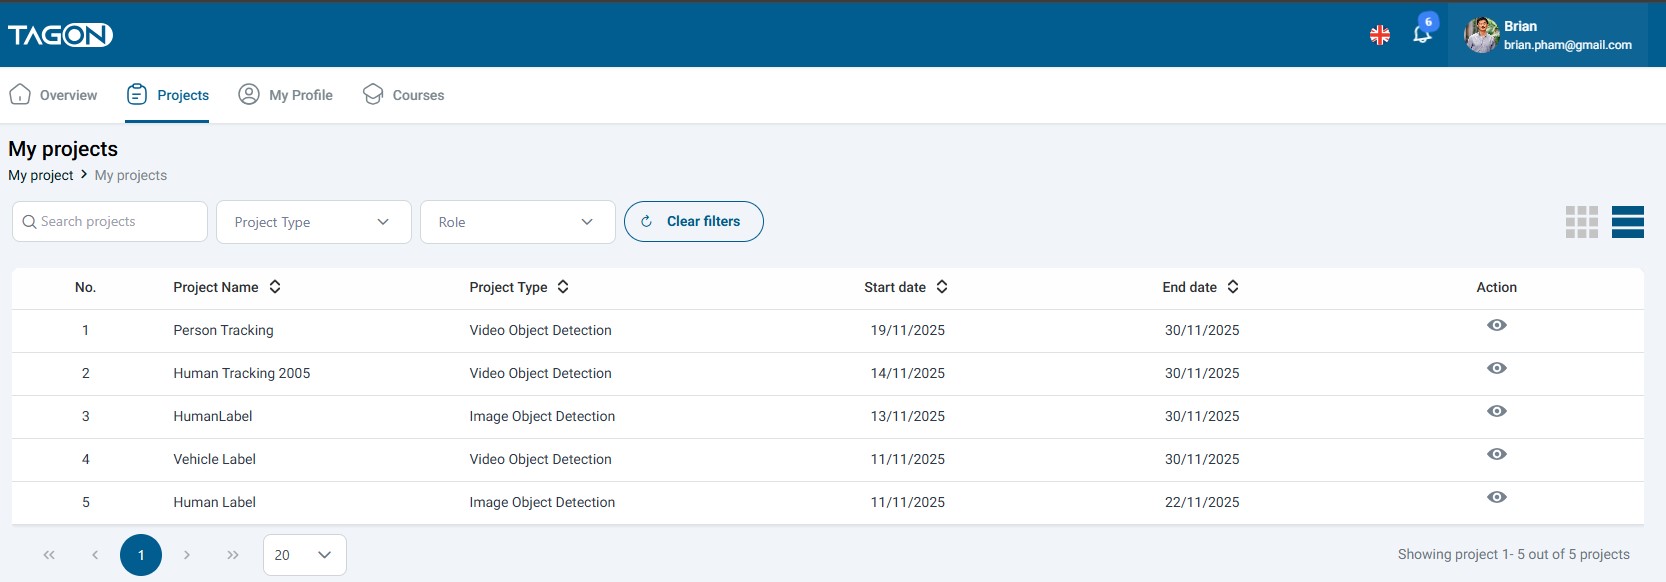
- Table Type: Displays projects in a structured table format for quick scanning
You can switch between these view types using the view toggle controls available on the screen.
Ongoing Projects
The Ongoing Projects section displays all projects that have been approved and are ready for you to work on. These are projects where you have successfully passed the test phase and have been accepted by the project requester.
Accessing Ongoing Projects
To access the Ongoing Projects section:
- Log in to your TagOn account using your credentials
- Navigate to the My Projects section from the main navigation menu
- The system will automatically display the Ongoing Projects screen in Card Type view by default
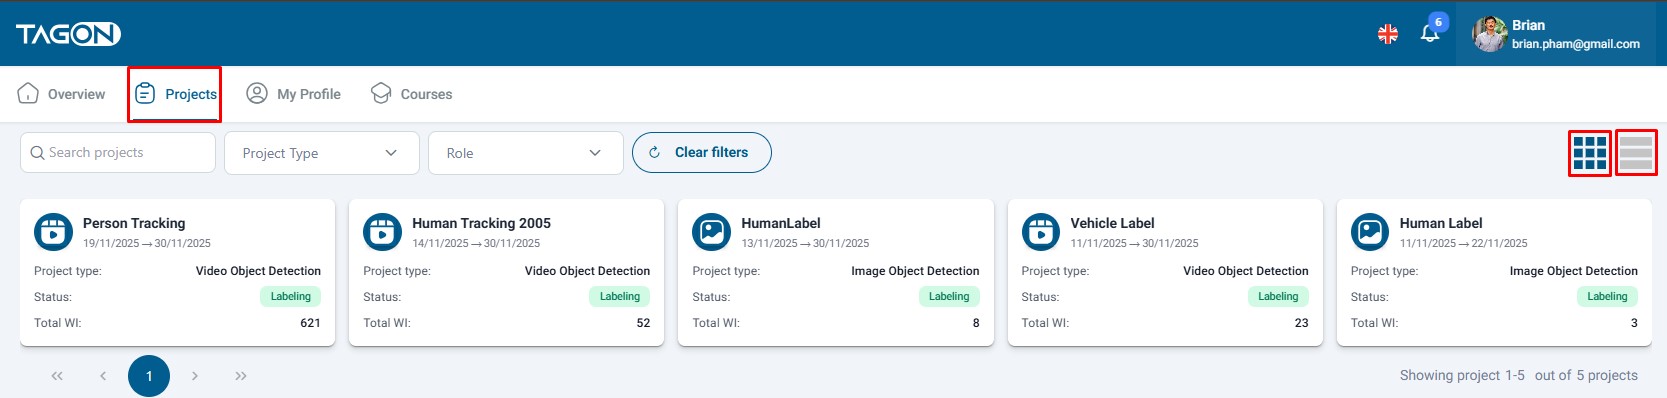
Understanding the Ongoing Projects Screen
The Ongoing Projects screen provides a comprehensive overview of all your active projects. Each project card or table row contains essential information including:
- Project Name: The title of the annotation project
- Project Type: The category of annotation work (Image classification, Object tagging, Speech to text, OCR, etc.)
- Project Status: Current phase of the project (Labeling or Reviewing)
- Deadline Information: Important dates and time remaining
- Price Information: Payment details and bid information
- Progress Indicators: Your completion status and project statistics
- Action Icons: Quick access buttons for various project-related tasks
Searching and Filtering Projects
When you have multiple ongoing projects, finding the specific project you need can be challenging. The TagOn platform provides three powerful methods to help you locate projects quickly:
Method 1: Text Search
The most straightforward way to find a project is using the search functionality:
- Locate the "Search for projects" search box at the top of the screen
- Enter any part of the project name you're looking for
- The system will filter projects in real-time as you type
- Results are case-insensitive and match partial project names
Tips for Effective Searching:
- You can search by project name, keywords, or project ID
- The search works across all visible project information
- Clear the search box to return to viewing all projects
Method 2: Filter by Project Type
Projects are categorized by the type of annotation work required. You can filter projects to show only specific types:
- Click on the Project Type filter dropdown
- Select one of the available project types:
- Image classification: Projects requiring categorization of images into predefined classes
- Object tagging in images: Projects requiring identification and labeling of objects within images
- Speech to text: Projects involving transcription of audio recordings
- OCR project: Projects involving optical character recognition and text extraction
- The screen will update to show only projects matching the selected type
- You can select multiple project types if needed
Understanding Project Types:
- Each project type has different requirements and skill sets
- Some project types may have higher or lower payment rates
- Filtering helps you focus on projects that match your expertise
Method 3: Sort Projects
Organizing projects by different criteria helps you prioritize your work effectively:
- Click on the Sort dropdown menu
- Choose from the following sorting options:
- Decreasing price: Shows highest-paying projects first (useful for maximizing earnings)
- Increasing price: Shows lowest-paying projects first
- Nearest deadline: Shows projects with the closest deadlines first (helps manage urgent tasks)
- Farthest deadline: Shows projects with the furthest deadlines first
- Latest creation date: Shows most recently created projects first
- Oldest creation date: Shows oldest projects first
Best Practices for Sorting:
- Use "Nearest deadline" when you need to prioritize urgent work
- Use "Decreasing price" to focus on higher-value projects
- Regularly check "Latest creation date" to discover new opportunities

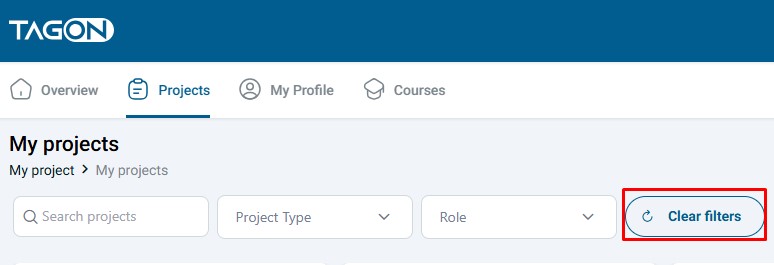
Clearing Filters and Starting New Searches
After applying filters or performing searches, you may want to reset the view to see all projects again:
- Locate the Clear filter button (typically displayed when filters are active)
- Click Clear filter to remove all applied filters and search terms
- The screen will return to showing all ongoing projects
- You can then perform new searches or apply different filters using the three methods described above
Finding New Projects
If you don't see any projects in the Ongoing Projects section, it means you either:
- Haven't registered for any projects yet
- Are still waiting for project approvals
- Need to complete test tasks for registered projects
To find and register for new projects:
- Click the Search for project button or navigate to the project search section
- Browse available projects that match your skills and interests
- Follow the registration process as detailed in the Project Registration Guide
- Complete any required test tasks
- Wait for project approval from the requester
Project Card Information
Each project card in the Card Type view displays comprehensive information about the project:
- Project Header: Project name and identification
- Status Badge: Visual indicator showing current project phase
- Project Details: Type, deadline, price, and other relevant information
- Action Buttons: Quick access to project-specific tasks
- Progress Indicators: Visual representation of completion status
Project Statuses
Projects in the Ongoing Projects section can have one of two main statuses:
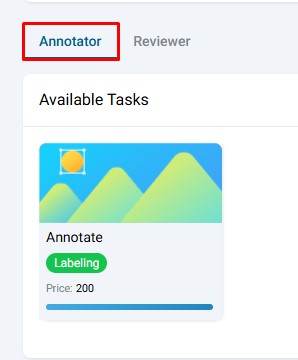
Status 1: Labeling
The Labeling status indicates that the project is in the active annotation phase. When a project has this status:
- You can perform labeling tasks according to the project requirements
- The project is actively accepting annotations
- You should focus on completing labeling tasks accurately and efficiently
- Progress tracking is available to monitor your completion rate
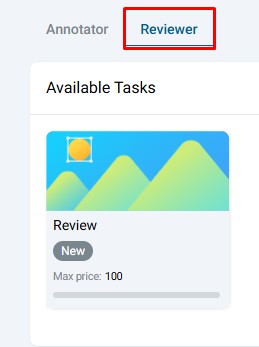
Status 2: Reviewing
The Reviewing status indicates that the project has moved to the quality assurance phase. When a project has this status:
- The initial labeling phase has been completed
- Reviewers are now evaluating the quality of annotations
- If you're assigned as a reviewer, you can perform review tasks
- Annotators may need to make corrections based on review feedback
Important Note: Each account can only perform one role (either Labeler or Reviewer) in the same project. You cannot be both a labeler and a reviewer for the same project simultaneously.
Available Actions on Projects
Based on the project status and your assigned role, you can perform several actions:
Action 1: Label
When a project is in the Labeling phase and you are assigned as a labeler:
- Locate the Labeling icon on the project card or in the table row
- Click on the Labeling icon to open the labeling interface
- Follow the task requirements and guidelines provided for the project
- Complete annotations accurately and according to specifications
- Save your work regularly to avoid data loss
- Submit completed tasks when finished
Labeling Best Practices:
- Read all project guidelines and instructions carefully before starting
- Maintain consistency in your labeling approach
- Ask questions if any requirements are unclear
- Take breaks to maintain accuracy and focus
- Review your work before submitting
Action 2: Review
When a project is in the Reviewing phase and you have been invited as a reviewer:
- Locate the Evaluation icon (also called Review icon) on the project card
- Click on the Evaluation icon to access the review interface
- Review the annotations submitted by labelers
- Check for accuracy, completeness, and adherence to project guidelines
- Provide feedback or mark items for correction if needed
- Complete your review tasks according to the review requirements
Review Guidelines:
- Be thorough but fair in your evaluations
- Provide constructive feedback when corrections are needed
- Follow the review criteria specified in the project guidelines
- Maintain consistency in your review standards
- Document any patterns or recurring issues you notice
Role Limitation: Remember that each account can only perform one role in the same project. If you are assigned as a reviewer, you cannot also perform labeling tasks for that project, and vice versa.
Action 3: Edit a Rated Sentence
After completing project evaluation, some annotations may be marked as incorrect and returned for correction:
- Locate the Edit a rated sentence icon on the project card
- Click on the icon to view sentences or annotations that need correction
- Review the feedback provided by the reviewer
- Make the necessary corrections according to the task requirements
- Resubmit the corrected work for review
Correction Process:
- Carefully read all feedback and correction requests
- Understand what was incorrect and why
- Make corrections that address the specific issues identified
- Ensure corrections align with project guidelines
- Submit corrections promptly to avoid project delays
Action 4: View Details
To access comprehensive information about a project:
- Click on the View details icon on the project card or table row
- The project detail screen will be displayed with complete information including:
- Full project description and requirements
- Detailed guidelines and instructions
- Payment terms and conditions
- Deadline information
- Project statistics and progress
- Contact information for the requester
- Frequently asked questions
- Review all details carefully before starting work
- Use this information to understand project expectations
For more detailed information about project details, refer to the Project Details Documentation.
Table Type View
The Table Type view provides an alternative way to view and manage your ongoing projects:
- Switch to Table Type view using the view toggle control
- Projects are displayed in a structured table format with columns for:
- Project name
- Project type
- Status
- Deadline
- Price
- Progress
- Actions
- All actions available in Card Type view are also available in Table Type view
- Table view is particularly useful when you have many projects and need to quickly scan information
- You can sort columns by clicking on column headers
- Filtering and searching work the same way as in Card Type view
When to Use Table Type:
- When you have many projects and need to compare information quickly
- When you prefer a more compact, data-focused view
- When you need to sort by multiple criteria simultaneously
- When working on projects that require frequent status checking
Registered Projects
The Registered Projects section displays all projects you have registered for but are still in various stages of the approval process. These projects are not yet available for active work, but you can monitor their status and take necessary actions.
Understanding Registered Projects
Registered projects represent your applications to participate in annotation projects. After you register for a project and complete any required test tasks, the project requester reviews your application and test results. During this review period, the project appears in your Registered Projects section.
Project Registration Statuses
The Registered Projects screen displays projects in different states based on where they are in the approval process. Understanding these statuses helps you know what actions you can take and what to expect next.
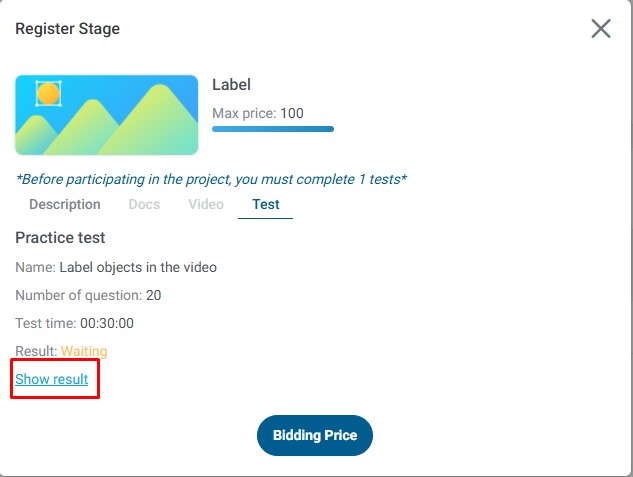
Status 1: Waiting for Approval
After completing a test task for a project, your application enters the approval phase:
- Test Completion: You have successfully completed the required test task
- Submission: Your test results and bid price have been submitted
- Review Period: The project requester is reviewing your test performance
- Visual Indicator: The "Do test" icon is hidden because you've already completed the test
- Current State: Waiting for the requester's decision
What to Expect:
- The review process typically takes a few days, depending on the requester
- You will receive an email notification when a decision is made
- If approved, the project will move to your Ongoing Projects section
- If rejected or revision is required, you'll see different status indicators
What You Can Do:
- Monitor the project status regularly
- Wait patiently for the requester's decision
- Check your email for notifications
- Continue working on other approved projects
Status 2: Test Rejection
If your test results do not meet the project requirements, the requester may reject your application:
- Rejection Notification: You will receive an email notification stating that your request to join the project has been rejected
- Status Display: The project will show as "Rejected" in your Registered Projects section
- Test Results: The requester has reviewed your test and determined it doesn't meet requirements
- Feedback Available: Test results are returned to you for review
Viewing Rejection Results:
- Locate the rejected project in your Registered Projects section
- Click on the "View results" button or link
- Review the test results and any feedback provided by the requester
- Understand what areas need improvement
- Use this information to improve your performance on future projects
Learning from Rejections:
- Carefully review all feedback provided
- Identify patterns in areas that need improvement
- Practice the skills that were lacking
- Apply lessons learned to future test tasks
- Don't be discouraged—rejections are learning opportunities
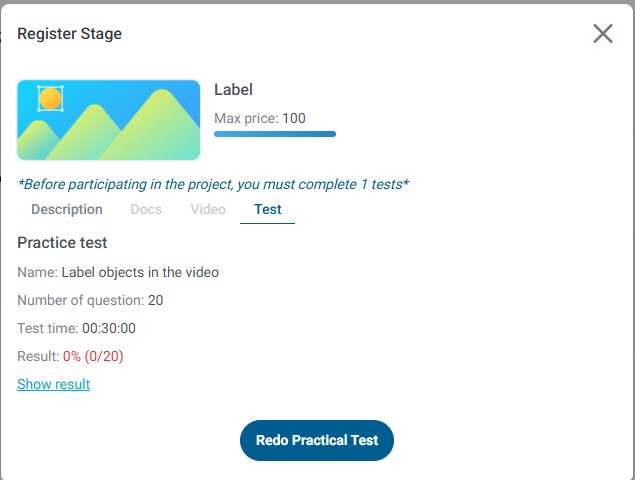
Status 3: Test Revision Required
Sometimes, requesters may allow you to retake a test if your initial attempt was close to meeting requirements:
- Revision Request: You will receive an email notification stating "Request to retake test for project participation in [Project Name]"
- Status Display: The project will show as requiring "Test Revision" or "Retake Test"
- Opportunity: The requester is giving you another chance to demonstrate your skills
- Action Required: You need to retake the test to continue with the application
Retaking the Test:
- Locate the project requiring test revision in your Registered Projects section
- Click on "View results" to see your previous test results and feedback
- Review what went wrong in your initial attempt
- Click on "Redo test" to start the retake process
- Carefully complete the test again, applying lessons learned from the feedback
- Submit your revised test results
- Wait for the requester's review of your retake
Tips for Successful Retakes:
- Thoroughly review all feedback from the initial test
- Understand the specific requirements you missed
- Take your time and be more careful with the retake
- Ask questions if anything is unclear
- Double-check your work before submitting
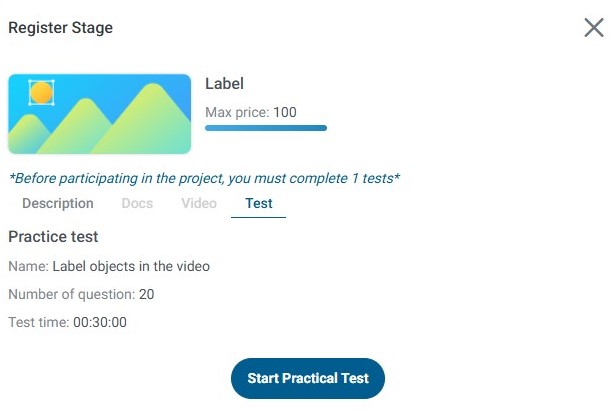
Understanding Test Tasks
Test tasks are an essential part of the project registration process. They serve multiple important purposes:
Purpose of Test Tasks
- Quality Assurance: Test tasks ensure that annotators have the skills and attention to detail required for the project
- Skill Assessment: Requesters evaluate your ability to follow guidelines and produce accurate annotations
- Fair Selection: Test results help requesters select the most qualified annotators for their projects
- Standard Setting: Tests establish quality standards that all annotators must meet
Test Task Characteristics
- Project-Specific: Each project has its own unique test designed for that specific annotation type
- Bid Price: You must submit a bid price along with your test results
- Scoring System: Tests are typically scored based on accuracy and adherence to guidelines
- Time-Limited: Some tests may have time constraints
- One-Time Opportunity: Usually, you only get one chance to take the test (unless revision is requested)
Maximizing Your Test Performance
To increase your chances of passing tests and getting approved for projects:
- Read Carefully: Thoroughly read all project guidelines and instructions before starting
- Understand Requirements: Make sure you fully understand what is expected
- Take Your Time: Don't rush—accuracy is more important than speed
- Follow Guidelines: Strictly adhere to all provided guidelines and instructions
- Check Your Work: Review your test submissions before submitting
- Appropriate Bidding: Submit a competitive but fair bid price
- Ask Questions: If anything is unclear, contact the requester before submitting
Important: The higher your test score and the more competitive your bid price, the greater your chances of being selected for the project. However, don't bid too low as this may not be sustainable for your work.
Managing Registered Projects
Effective management of your registered projects helps you stay organized and maximize your opportunities:
- Regular Monitoring: Check your Registered Projects section regularly for status updates
- Email Notifications: Keep an eye on your email for approval, rejection, or revision notifications
- Status Tracking: Keep track of which projects are pending, rejected, or require revision
- Follow-Up Actions: Take prompt action when revisions are requested
- Learning and Improvement: Use feedback from rejections to improve your skills
Transition from Registered to Ongoing
When a registered project is approved:
- You will receive an email notification of approval
- The project will automatically move from Registered Projects to Ongoing Projects
- You can immediately begin working on the project
- All project tools and interfaces become available
- You can start earning from the project
Best Practices and Tips
Project Management
- Prioritize by Deadline: Focus on projects with nearest deadlines first
- Balance Workload: Distribute your time across multiple projects to maintain steady income
- Track Progress: Regularly monitor your completion rates and project statistics
- Maintain Quality: Don't sacrifice accuracy for speed—quality is paramount
- Communicate: Reach out to requesters if you have questions or encounter issues
Maximizing Efficiency
- Use Filters: Leverage search and filter tools to quickly find projects
- Switch Views: Use Table Type for quick scanning, Card Type for detailed overview
- Bookmark Important Projects: Keep track of high-priority projects
- Set Reminders: Note important deadlines and milestones
- Batch Similar Tasks: Group similar annotation tasks together for efficiency
Quality Assurance
- Follow Guidelines: Always adhere strictly to project guidelines
- Review Before Submission: Double-check your work before submitting
- Learn from Feedback: Incorporate feedback from reviews into your future work
- Maintain Consistency: Keep your annotation style consistent throughout a project
- Ask for Clarification: Don't guess—ask questions when requirements are unclear
Troubleshooting Common Issues
Issue: Projects not appearing in Ongoing Projects
- Solution: Check Registered Projects section—you may still be waiting for approval
Issue: Cannot perform actions on a project
- Solution: Verify your role (Labeler vs. Reviewer) and project status
Issue: Search not finding projects
- Solution: Clear filters and try different search terms
Issue: Test results not available
- Solution: Check email for notifications and allow time for requester review
Additional Resources
For more information about related topics, please refer to:
- Project Registration Guide: Detailed instructions on registering for projects
- Project Search Documentation: How to find and search for available projects
- Account Profile Settings: Managing your account and profile information
If you encounter any issues or have questions about managing your projects, please contact TagOn support for assistance.