Project Search
The Project Search feature allows you to discover and register for available projects on the TagOn platform. This guide will walk you through the complete process of finding projects, registering for them, taking qualification tests, and understanding the approval process.
Overview
Before you can start working on projects, you need to:
- Find Available Projects: Browse through projects that are open for registration
- Register for Projects: Express your interest in participating
- Take Qualification Tests: Complete tests to demonstrate your skills
- Submit Bidding Price: Set your desired compensation rate
- Wait for Approval: Receive notification about your application status
The entire process ensures that only qualified annotators who understand the project requirements can participate, maintaining high quality standards across all projects.
Step 1: Access the Project Search Screen
To begin searching for available projects, you need to navigate to the project search interface:
- Log in to TagOn: Access your account using your credentials
- Navigate to My Projects: From the main dashboard, click on "My Projects" in the navigation menu
- Select Hiring Projects: On the My Projects screen, locate and click on the "Hiring projects" tab or button
- View Find Projects Screen: The "Find projects" screen will appear, displaying all available projects that are open for registration
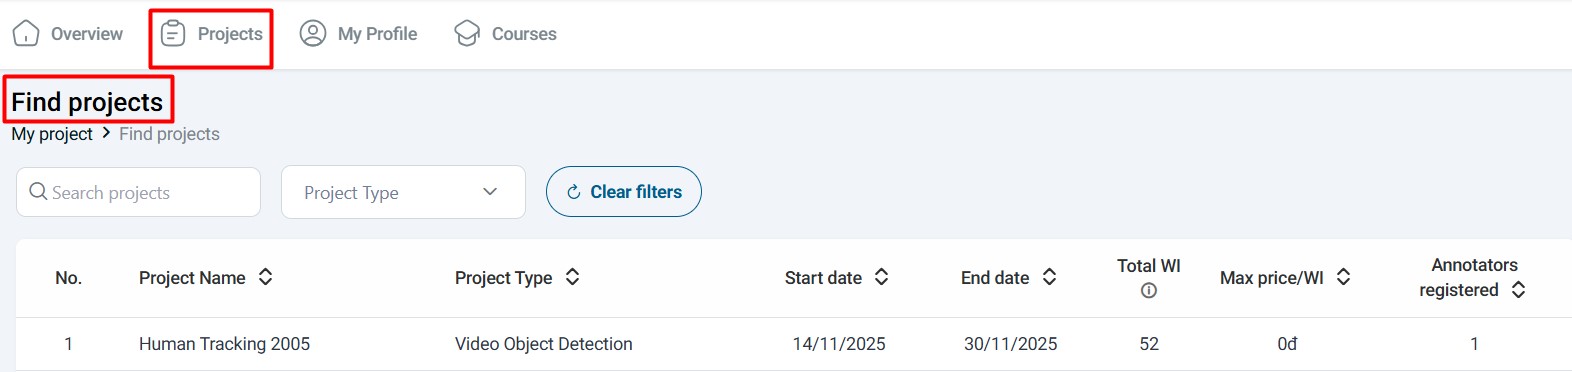
- Click Search for Projects: Click on the "Search for Projects" button to access the full project search interface with filtering and sorting options
Only projects that have been made public by the Project Administrator will appear in this list. If you don't see any projects, it may mean that no projects are currently open for registration, or you may need to check back later.
Step 2: Register for a Project
Once you've found a project that interests you, follow these steps to register:
2.1. Select a Project
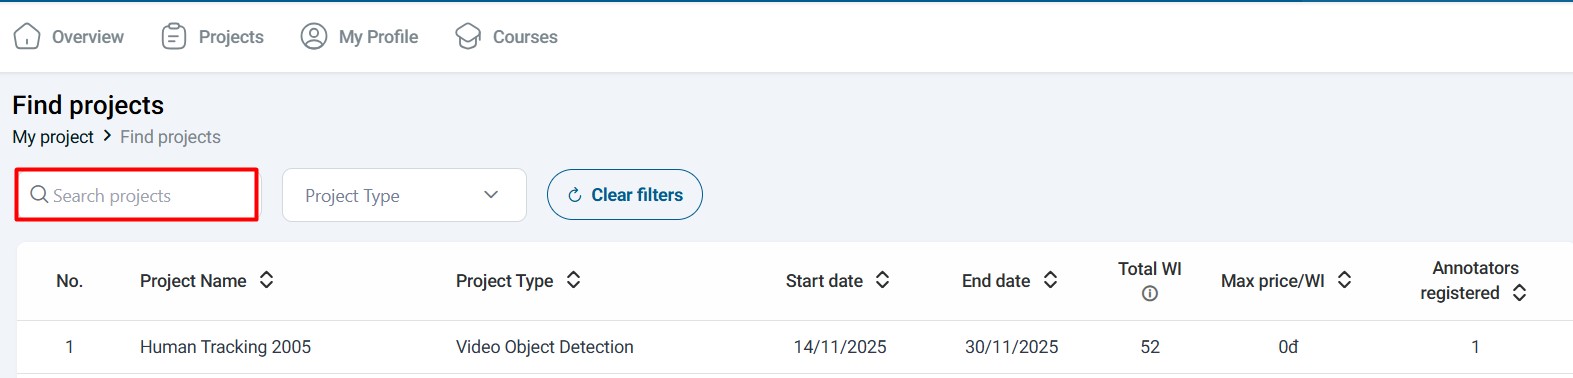
- Browse Available Projects: Review the list of available projects on the Project Search screen
- Review Project Details: Click on a project card to view detailed information including:
- Project description and requirements
- Required skills and qualifications
- Project timeline and deadlines
- Compensation information
- Number of available positions
- Select Your Project: Choose the project you want to register for based on your skills, interests, and availability
2.2. Initiate Registration
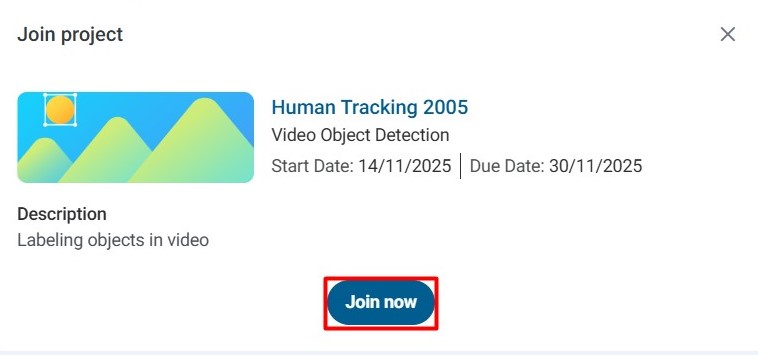
- Click on Selected Project: Click on the project card or project name to open the project details
- Join Project Dialog: A "Join Project" dialog box will appear with project information and registration options
- Click Join Now: Click the "Join Now" button to proceed with the registration process
2.3. Stage Registration Process
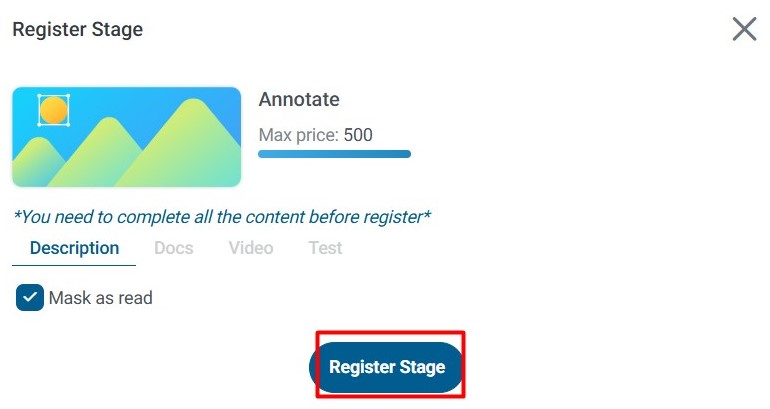
After clicking "Join Now", the Stage Registration dialog will appear, displaying comprehensive project details:
What You'll See in the Dialog:
- Project name and description
- Stage information and requirements
- Test requirements (if applicable)
- Compensation details
- Project timeline
- Any special instructions or prerequisites
Your Options:
-
Cancel: Click "Cancel" if you decide not to participate in the project. This will close the dialog and return you to the project search screen without registering.
-
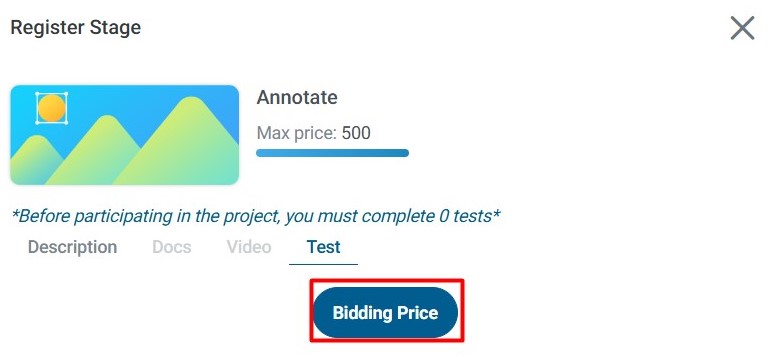
Register Stage: To proceed with registration:
- Click the "Register Stage" button
- A confirmation dialog will appear asking you to confirm your decision
- Click "Yes" to confirm your registration
- The system will then display the "Take the test" option (if a test is required)
Step 3: Complete the Qualification Test
Most projects require you to complete a qualification test before you can be approved. This test ensures that you understand the project requirements and can produce high-quality annotations.
3.1. Understanding the Test Purpose
Why Tests Are Required:
- Quality Assurance: Tests verify that you can meet the project's quality standards
- Skill Verification: They demonstrate your understanding of the annotation requirements
- Project Matching: They help match your skills with appropriate projects
- Standardization: They ensure all annotators understand the same guidelines
- Each project has its own unique test designed specifically for that project's requirements
- Test difficulty and format vary depending on the project type and complexity
- Your test performance directly impacts your chances of being selected for the project
3.2. Taking the Test
- Click Take the Test: After registering for the stage, click on the "Take the test" button to begin
- Read Instructions Carefully: Review all test instructions, guidelines, and examples before starting
- Complete Test Tasks: Follow the instructions to complete all required test annotations or questions
- Review Your Work: Before submitting, review your answers to ensure accuracy
- Submit the Test: Submit your completed test for evaluation
Test Tips:
- Take your time and read all instructions thoroughly
- Follow the project guidelines exactly as specified
- Review example annotations if provided
- Double-check your work before submitting
- Ensure you understand the labeling requirements
3.3. Submit Bidding Price
After completing the test, you need to set your bidding price:
- Locate Bidding Section: Find the "Bidding price" section or field
- Enter Your Price: Enter your desired compensation rate for the project
- Consider Market Rates: Research typical rates for similar projects to set a competitive price
- Submit Your Bid: Click the submit or confirm button to finalize your bid
Bidding Strategy:
- Higher Test Scores + Competitive Pricing: The combination of a high test score and a reasonable bidding price significantly increases your chances of being selected
- Balance Quality and Price: Requestors consider both your test performance and your bid when making approval decisions
- Market Research: Understanding typical rates for similar projects helps you set an appropriate bid
What Happens Next:
- Your registration, test results, and bidding price will be submitted to the Requestor
- The Requestor will review your application and make an approval decision
- You will receive a notification about the decision (see "View Test Results" section below)
View Test Results
After you complete the test and submit your bidding price, the Requestor will assess your performance and make a decision about your application. The evaluation process may take some time, depending on the project and the number of applicants.
Understanding the Approval Process
The Requestor reviews:
- Test Performance: Your accuracy and adherence to guidelines
- Quality of Annotations: The precision and correctness of your test submissions
- Bidding Price: Whether your price fits within the project budget
- Overall Fit: How well your skills match the project requirements
Possible Outcomes
Once the Requestor completes their review, you will receive an email notification with one of three possible outcomes:
1. Approval for the Project
What This Means:
- Your test was passed successfully
- The Requestor has approved your application
- You are now officially part of the project
What You'll Receive:
- An email notification stating: "Request to join project [Project Name] has been approved."
- Access to the project in your "My Projects" section
- Ability to start working on labeling tasks immediately
Next Steps:
- Check your email for the approval notification
- Navigate to "My Projects" in the TagOn interface
- Locate the approved project in your project list
- Begin working on available labeling tasks
- Review project guidelines and requirements before starting work
2. Rejection from the Project
What This Means:
- Your test did not meet the required quality standards
- The Requestor has decided not to approve your application
- You will not be able to work on this project
What You'll Receive:
- An email notification stating: "Request to join project [Project Name] has been rejected."
What You Can Do:
- Review the project requirements and guidelines more carefully
- Practice similar annotation tasks to improve your skills
- Apply for other projects that better match your current skill level
- Consider retaking the test if the option becomes available
Rejection from one project does not prevent you from applying to other projects. Each project has different requirements, and you may be better suited for different types of work.
3. Requested to Retake the Test
What This Means:
- The Requestor has reviewed your test but found areas that need improvement
- You are being given a second chance to demonstrate your capabilities
- This is an opportunity to show improvement and potentially get approved
What You'll Receive:
- An email notification stating: "Request to retake test for project participation in [Project Name]."
What You Should Do:
- Review Feedback: Check if any feedback was provided about your previous test attempt
- Study Guidelines: Re-read the project guidelines and requirements carefully
- Review Examples: Study any example annotations or documentation provided
- Prepare Thoroughly: Take time to understand what went wrong in your first attempt
- Retake the Test: Complete the test again with improved understanding and attention to detail
- Submit Again: Submit your retake test for re-evaluation
Tips for Retaking Tests:
- Pay close attention to the specific areas where you may have made mistakes
- Take more time to review guidelines and examples
- Ask questions if anything is unclear
- Double-check your work before submitting
- Consider practicing on similar tasks before retaking
Best Practices for Project Registration
To maximize your chances of successfully registering for projects:
- Read Project Descriptions Carefully: Understand the requirements before registering
- Check Your Skills Match: Only register for projects where you have the necessary skills
- Prepare for Tests: Review guidelines and examples before taking tests
- Set Realistic Bids: Research market rates and set competitive but fair prices
- Be Patient: Wait for approval decisions rather than registering for too many projects at once
- Learn from Feedback: If rejected, use the experience to improve for future applications
- Stay Active: Regularly check for new projects that match your skills