Segmentation Labeling Guide
Semantic segmentation is a computer vision task that involves classifying each pixel in an image into specific categories or classes. This labeling guide provides comprehensive instructions for performing semantic segmentation annotations on the TagOn platform, enabling you to create precise pixel-level masks for objects, regions, and areas of interest in images.
1. Main Interface Overview
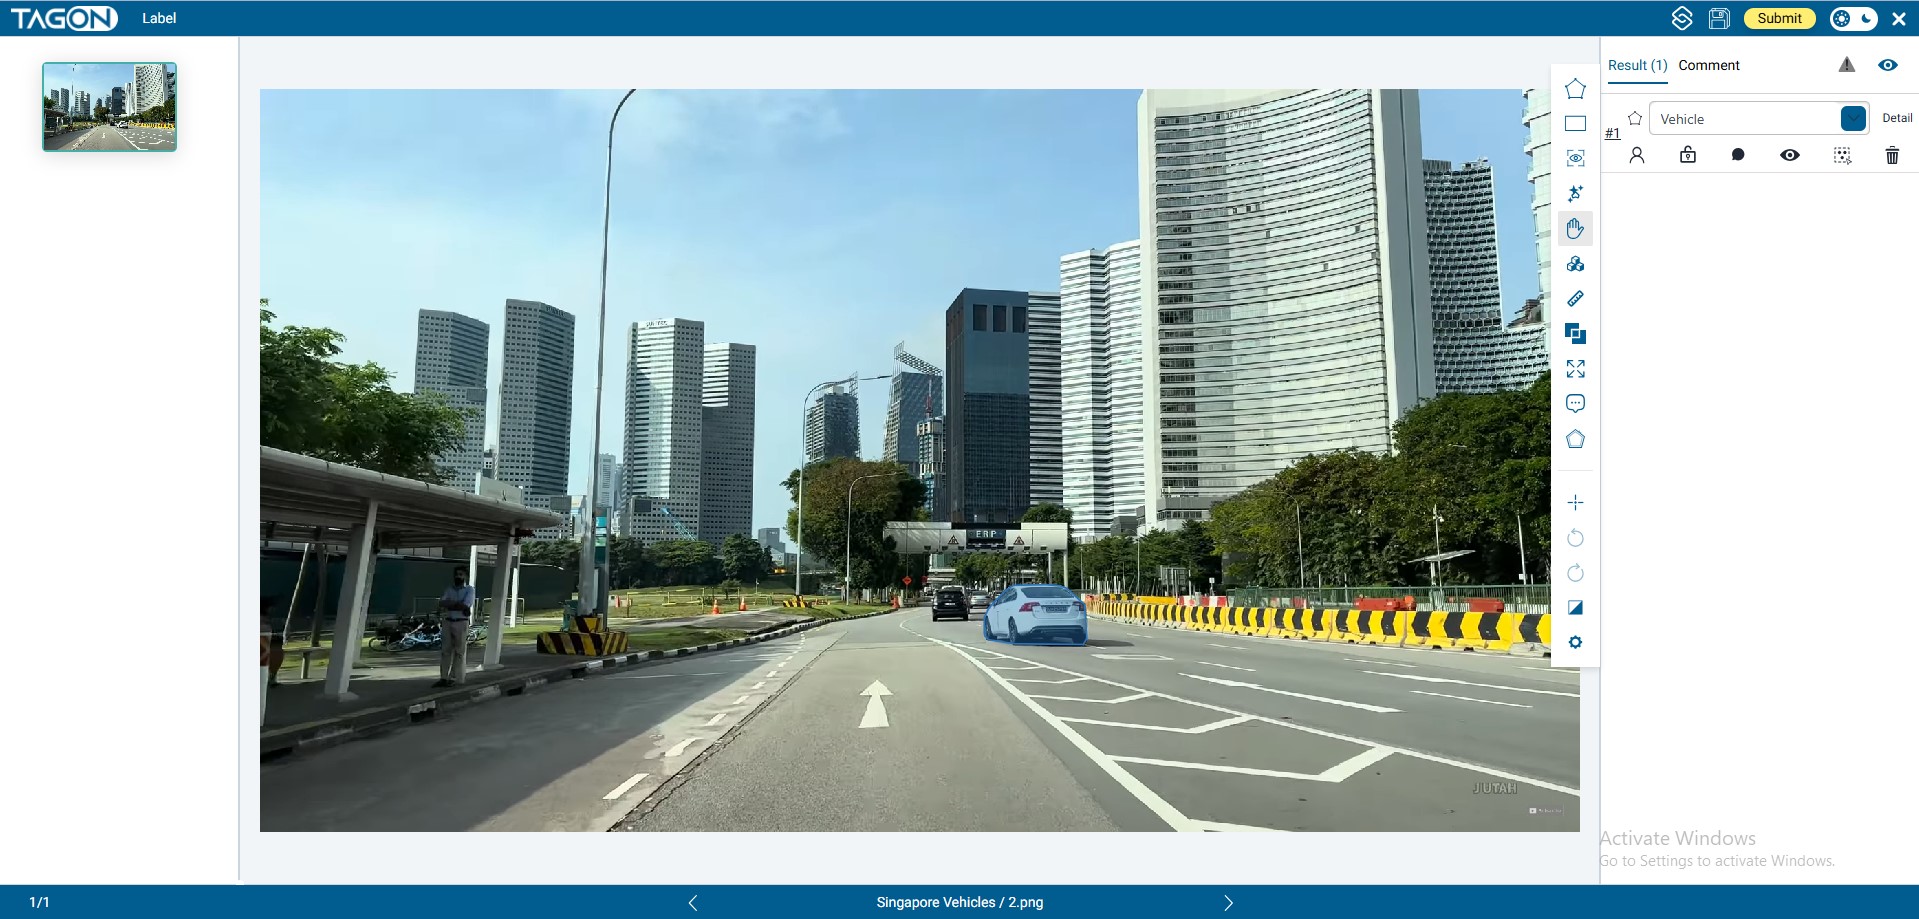
The semantic segmentation labeling interface is designed with an intuitive three-panel layout that provides easy access to all necessary tools and information. Understanding the interface layout is essential for efficient and accurate labeling work.
Left Panel: Image List
The left panel displays a scrollable list of image thumbnails for the current project or batch:
- Status Indicators: Visual indicators show which images have been completed, are in progress, or are pending
- Quick Preview: Hover over thumbnails to see a larger preview or image details
- Progress Tracking: Visual markers help you identify which images still need work
- Review all images in the batch before starting to understand the scope of work
- Use thumbnail status indicators to prioritize which images to work on
- Keep track of your progress by monitoring completed vs. pending images
Center Panel: Current Working Image
The center panel is your primary workspace where you perform all labeling operations:
- High-Resolution Display: The image is displayed at full resolution with zoom and pan capabilities
- Zoom Controls: Zoom in for detailed work on small objects or zoom out for overview
- Pan Functionality: Move around the image when zoomed in to access different areas
- Grid Overlay: Optional grid overlay helps with precise alignment and measurement
- Mask Visualization: Completed masks are displayed with color-coded overlays corresponding to their labels
Right Panel: Main Vertical Toolbar
The right panel contains all the tools and controls needed for labeling:
- Tool Selection: Access to all drawing and editing tools
- Label Properties: Settings and attributes for selected labels
- Tool Options: Configuration options for the currently selected tool
- Action Buttons: Save, submit, and other workflow actions
- Statistics: Real-time display of labeling progress and statistics
- Tools are organized logically from top to bottom
- Most frequently used tools are positioned for easy access
- Tool icons are designed to be intuitive and recognizable
- Keyboard shortcuts are displayed for quick reference
2. Labeling Steps
The semantic segmentation labeling process follows a specific sequence that ensures consistency and accuracy. Following these steps in order is crucial for creating high-quality annotations that meet project requirements.
Step 1: Select a Labeling Tool
Before you begin drawing, you must first select the appropriate labeling tool from the right toolbar. The tool you choose depends on the type of object you're labeling and the project requirements.
Available Tools
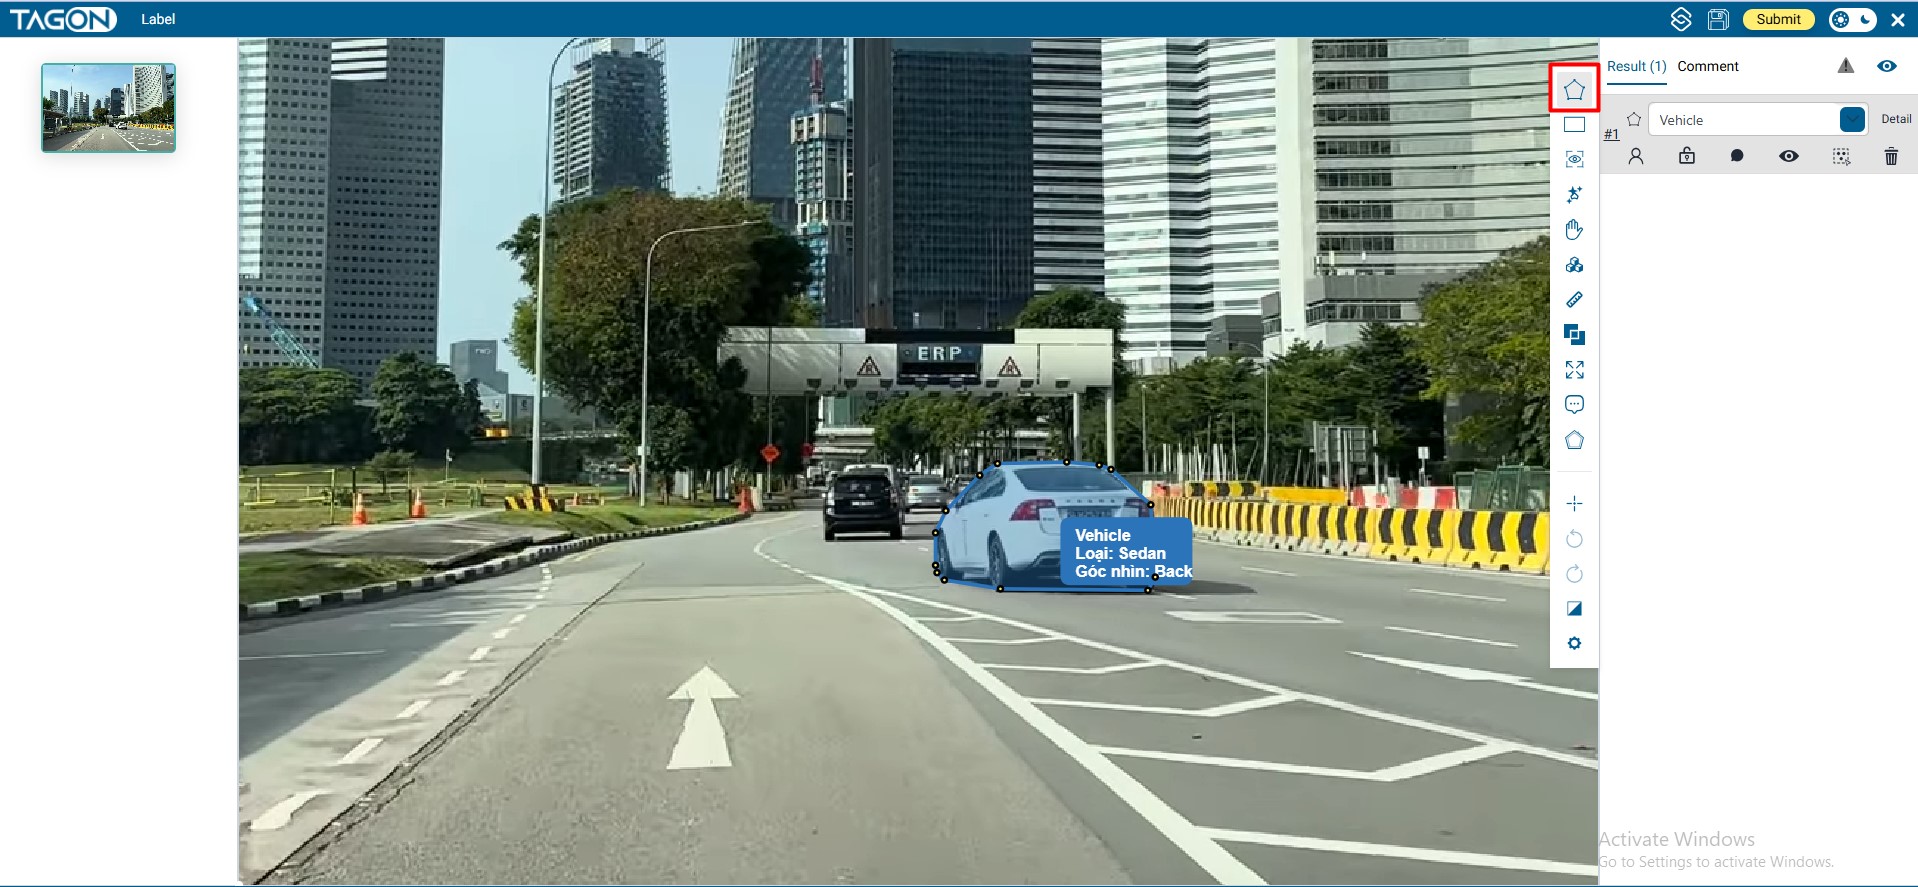
Draw Polygon (Keyboard Shortcut: G) ![]()
- Primary Use: The most versatile tool, suitable for most objects with irregular shapes
- Best For:
- Objects with complex, non-rectangular shapes (vehicles, people, animals, buildings)
- Objects that require precise edge following
- Organic shapes and natural objects
- Objects with curved or irregular boundaries
- When to Use: Use this tool when you need to accurately trace the exact outline of an object
- Advantages: Provides the most precise mask boundaries, essential for accurate segmentation
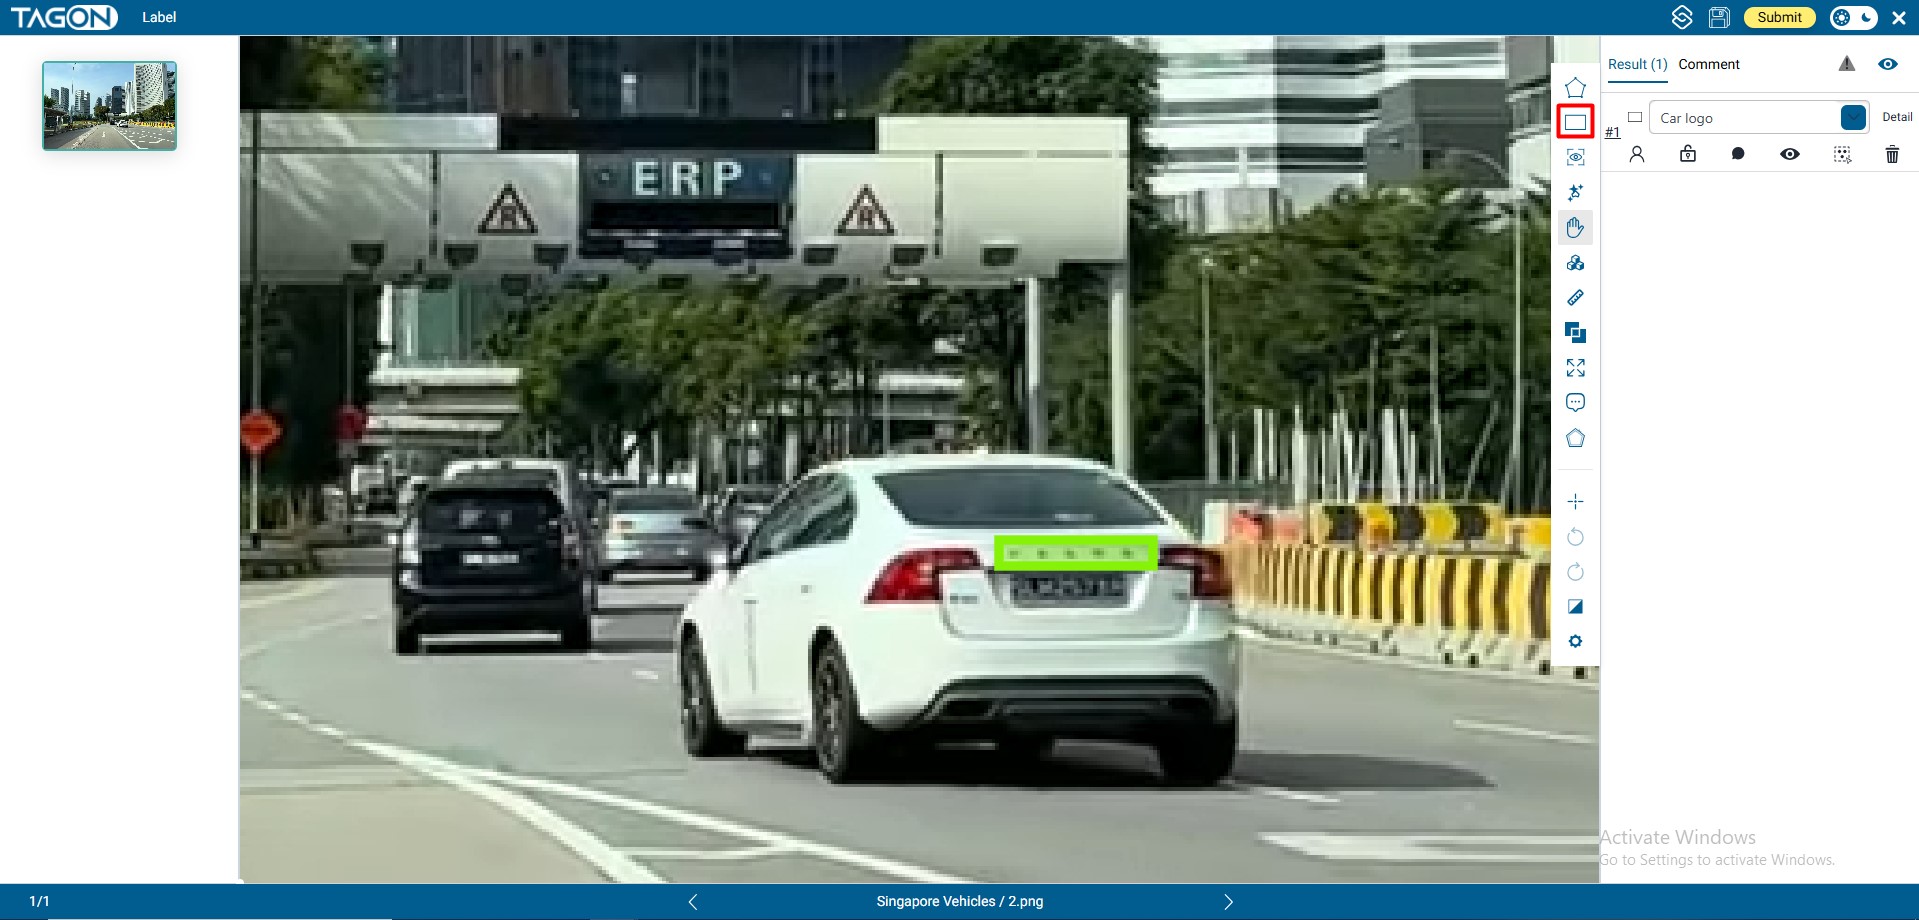
Draw Rectangle (Keyboard Shortcut: R) ![]()
- Primary Use: Quick labeling tool for objects with rectangular or box-like shapes
- Best For:
- Road signs and traffic signs (typically rectangular)
- Lanes and road markings (often rectangular)
- Buildings and structures with rectangular shapes
- Any object that can be adequately represented by a bounding box
- When to Use: Use when speed is important and rectangular approximation is acceptable per project guidelines
- Advantages: Fastest tool for r ectangular objects, reduces labeling time significantly
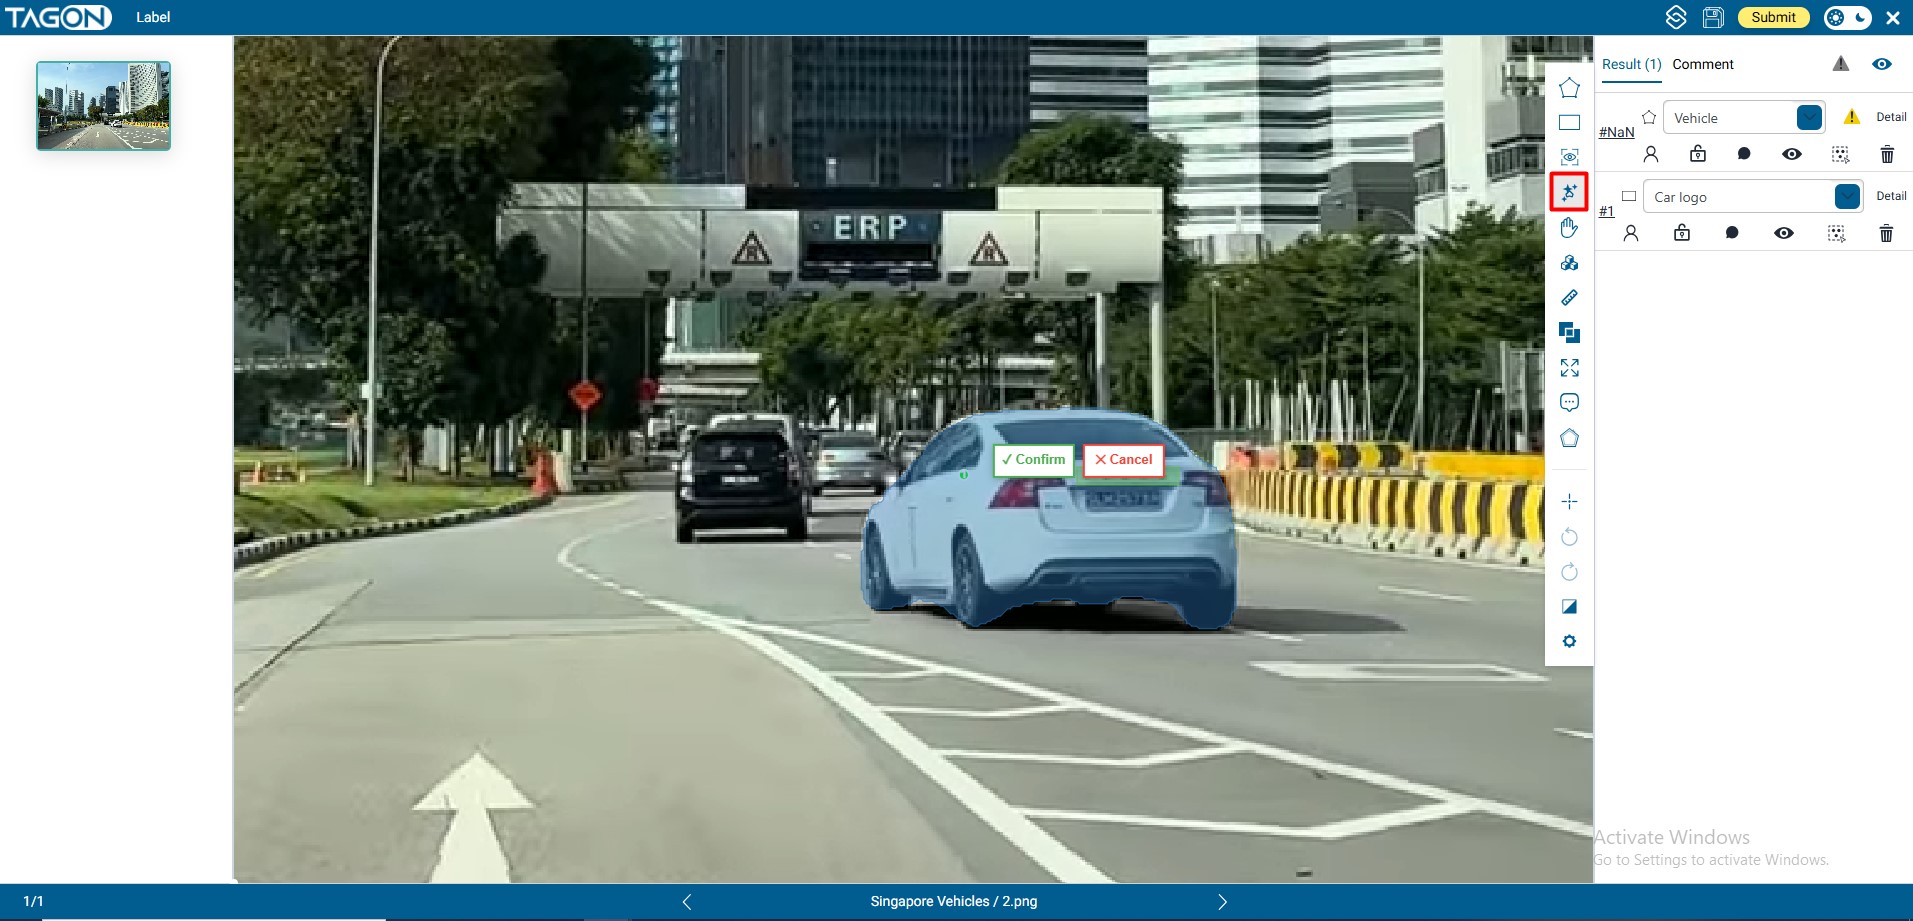
Auto Segment ![]()
- Primary Use: AI-assisted tool that generates mask suggestions with a single click
- Best For:
- Objects with clear boundaries and good contrast
- Well-defined objects that stand out from the background
- Speeding up labeling for similar objects
- Initial mask generation that you can refine
- How It Works: Click inside the object, and AI generates a suggested mask based on the surrounding pixels
- When to Use: Use when objects have clear visual boundaries and you want to speed up the labeling process
- Important: Always review and edit AI-generated masks to ensure accuracy
AI Segment ![]()
- Primary Use: Advanced AI tool that attempts to label the entire image at once
- Best For:
- Images with multiple similar objects
- Scenes with clear object boundaries
- Batch processing of similar images
- Initial pass labeling that requires review and correction
- How It Works: AI analyzes the entire image and generates masks for all detectable objects
- When to Use: Use for images with many objects or when you need a starting point for complex scenes
- Important: AI segment results always require careful review, editing, and correction to meet quality standards
Tool Selection Guidelines
- Read Project Guidelines: Always check project-specific requirements for tool usage
- Consider Object Shape: Match the tool to the object's shape characteristics
- Balance Speed and Accuracy: Choose tools that provide the right balance for your workflow
- Quality First: When in doubt, use the more precise tool (Polygon) to ensure accuracy
Step 2: Draw the Object Region
After selecting your tool, you'll draw the mask that defines the object's region in the image. The drawing process varies depending on the tool you've selected.
Drawing with Polygon Tool
The polygon tool allows you to create precise masks by placing points around the object's perimeter:
- Activate the Tool: Click the Polygon tool icon or press G on your keyboard
- Start Drawing: Click on the image at the edge of the object where you want to begin
- Place Points: Continue clicking around the object's perimeter, placing points at key locations:
- Click at corners and sharp turns
- Click along curves to maintain smooth boundaries
- Space points appropriately—not too close (wasteful) or too far (inaccurate)
- Close the Polygon: Complete the mask using one of these methods:
- Press Enter to automatically close the polygon
- Click on the first point you placed to close the polygon manually
- Right-click to close the polygon (if enabled)
- Review the Mask: After closing, review the mask to ensure it accurately follows the object's edges
- Precision Matters: Place points carefully to accurately follow object edges
- Zoom In: Use zoom for small objects or when precision is critical
- Smooth Curves: For curved edges, place more points to maintain smoothness
- Edit After Creation: You can always edit the polygon points after creation if needed
- Avoid Overlapping: Ensure masks don't overlap unless the project guidelines specify otherwise
Drawing with Rectangle Tool
The rectangle tool is the fastest way to create masks for rectangular objects:
- Activate the Tool: Click the Rectangle tool icon or press R on your keyboard
- Start the Rectangle: Click and hold at one corner of the object (or where you want the rectangle to start)
- Drag to Create: While holding the mouse button, drag to the opposite corner
- Release to Complete: Release the mouse button when the rectangle covers the object appropriately
- Adjust if Needed: You can resize or move the rectangle after creation if adjustments are needed
- Quick Approximation: Use rectangles when exact edge precision isn't critical
- Align with Object: Try to align rectangle edges with the object's actual edges
- Check Guidelines: Verify that rectangular approximation is acceptable per project requirements
- Consider Editing: You may be able to convert rectangles to polygons for refinement if needed
Drawing with Auto Segment Tool
The auto segment tool uses AI to generate masks with minimal input:
- Activate the Tool: Click the Auto Segment tool icon in the toolbar
- Click Inside Object: Click once inside the object you want to label (not on the edge)
- Wait for AI Processing: The system processes your click and generates a suggested mask
- Review the Result: Carefully examine the AI-generated mask
- Edit if Needed:
- If the mask is mostly correct, make minor adjustments using editing tools
- If the mask is incorrect, delete it and try clicking in a different location
- You can also manually refine the mask edges
- Click Location Matters: Click near the center of the object for best results
- Object Contrast: Works best when objects have clear contrast with the background
- Review Always Required: Never accept AI suggestions without review
- Multiple Attempts: If the first suggestion is poor, try clicking in different locations
- Combine with Manual Editing: Use auto segment as a starting point, then refine manually
Drawing with AI Segment Tool
The AI segment tool attempts to label entire images automatically:
- Activate the Tool: Click the AI Segment tool icon in the toolbar
- Process the Image: The AI analyzes the entire image and generates masks for detected objects
- Wait for Completion: Processing may take a few moments depending on image complexity
- Review All Masks: Carefully examine every AI-generated mask in the image
- Edit and Correct:
- Delete incorrect masks
- Adjust mask boundaries that are close but not perfect
- Add missing objects that the AI didn't detect
- Correct mislabeled objects
- Verify Labels: Ensure all masks have the correct labels assigned
- Not a Replacement: AI segment is a starting point, not a final solution
- Thorough Review Required: Every AI-generated mask must be reviewed
- Expect Errors: AI will miss objects, create incorrect masks, and make labeling mistakes
- Quality Control: Use AI segment to speed up initial labeling, but always perform quality checks
- Project Guidelines: Verify that AI-assisted labeling is allowed for your specific project
Step 3: Assign a Label from the List (Required)
After creating a mask, you must assign it a label. This step is mandatory—masks without labels are incomplete and will not be accepted.
Label Assignment Process
- Mask Creation Complete: Ensure your mask is fully drawn and closed
- Locate Label List: Find the label list in the right toolbar (typically at the top)
- Review Available Labels: Familiarize yourself with all available labels for the project
- Select Appropriate Label: Click on the label that correctly describes the masked object
- Verify Assignment: Confirm that the mask now displays with the correct label color/indicator
- Check Label Accuracy: Double-check that you've selected the correct label category
Label Assignment Best Practices
- Accuracy First: Always select the most accurate label, even if it takes a moment to find
- Consistency: Use the same label for the same type of objects throughout the project
- Review Guidelines: Refer to project guidelines when unsure about label selection
- Check Examples: Review example annotations to understand label usage
- Ask Questions: Contact project administrators if label definitions are unclear
- Double-Check: Before moving to the next object, verify the label is correct
Label Properties and Attributes
Some projects may require additional properties or attributes for labels:
- Subcategories: Some labels may have subcategories (e.g., Vehicle → Car, Truck, Bus)
- Attributes: Objects may require attribute assignment (e.g., Person → Standing, Walking, Running)
- Confidence Levels: Some projects may require confidence ratings for uncertain labels
- Occlusion Status: Mark objects as occluded if they are partially hidden
Important: The mask instantly receives the label when you click it. You can change the label later if you made a mistake, but it's more efficient to select the correct label the first time.
3. Keyboard Shortcuts Reference
Keyboard shortcuts are the fastest way to keep quality high while working at production speed. Memorizing a small core set dramatically cuts the time spent hunting through menus, and the advanced combos help you correct mistakes without breaking your flow. The tables below list the official TagOn keyboard shortcuts (December 2025) exactly as they appear in the in-app shortcut palette, along with quick reminders for when to use them.
Official TagOn Label Keyboard Shortcuts
How to open this list anytime
| Shortcut | Function | When to use it |
|---|---|---|
| Ctrl + / | Open the in-app keyboard shortcut panel | Use whenever you forget a hotkey mid-session; the overlay pauses nothing and can be closed instantly. |
Core Shortcuts (use every minute)
| Shortcut | Function | Why it matters |
|---|---|---|
| G | Draw Polygon (primary tool) | Precision masks for 90% of objects; keep one hand on G at all times. |
| R | Draw Rectangle | Fastest way to block out signs, lanes, and boxy assets. |
| M | Move selected mask | Adjust misaligned masks without redrawing. |
| D | Toggle drawn/undrawn areas | Instantly reveals unlabeled gaps before submission. |
| Esc | Exit current action & deselect | Abort mistakes the moment they happen. |
| Enter | Close/finish polygon | Confirms a polygon without touching the mouse. |
| Delete | Delete selected mask | Clean up incorrect masks in one tap. |
| Ctrl + Z | Undo | Your safety net—use liberally. |
| Ctrl + A | Select all masks in frame | Perfect for bulk moving or deleting. |
| Ctrl + C | Copy selected mask(s) | Reuse masks for repeated objects. |
| Ctrl + V | Paste copied mask(s) | Drops the copied mask exactly where the cursor is. |
| Ctrl + S | Save | Hit every few minutes to avoid accidental data loss. |
| Ctrl + Shift + S | Submit | Finalize once everything passes QA checks. |
| N | Toggle drawing permission | Toggle drawing state on/off |
| Ctrl + I | Show project labeling guidelines | Open the documentation overlay without leaving the task. |
| Ctrl + G | Show/hide mask borders | Helpful when masks overlap and you need clear edges. |
Polygon Editing Shortcuts
| Shortcut | Function | Pro tip |
|---|---|---|
| Shift + drag mouse | Auto-generate points for smooth curves | Great for round wheels, helmets, or road bends. |
| Alt + left-click (point) | Delete that point | Remove jitter without restarting the polygon. |
| Alt + left-click (edge) | Add a new point midway along an edge | Perfect for tightening loose segments. |
| Right-click | Delete last point or finish/remove final segment | Use as an emergency “step back” while drawing. |
View & Navigation
| Shortcut | Function | Usage note |
|---|---|---|
| Space + drag | Pan image | Keep your off-hand on Space to fly across large canvases. |
| Ctrl + mouse wheel | Zoom in/out | Combine with Space + drag for pixel-perfect edits. |
| Ctrl + left-click + drag | Move entire cuboid (3D projects only) | Essential when aligning 3D boxes with perspective shifts. |
- Practice Regularly: Regular use of shortcuts will make them second nature
- Start with Basics: Begin with the most common shortcuts (G, R, Ctrl+Z, Delete) and gradually learn others
- Customize if Available: Some platforms allow shortcut customization—adjust to your preferences
- Print Reference: Keep a printed reference nearby until shortcuts become automatic
- Combine Shortcuts: Many shortcuts can be combined for efficient workflows (e.g., G to select tool, then Enter to complete)
Efficiency Workflow Using Shortcuts
An efficient labeling workflow using shortcuts:
- Press Arrow Keys to navigate to the next image
- Press G to activate polygon tool
- Draw the mask by clicking points
- Press Enter to complete the polygon
- Click the appropriate label in the label list
- Press Delete if you need to remove a mask
- Press Ctrl + Z to undo if you make a mistake
- Use Space + drag to pan when zoomed in
- Use Ctrl + mouse wheel to adjust zoom level
- Press Arrow Keys to move to the next image and repeat
4. Best Practices for Semantic Segmentation Labeling
Following best practices ensures that your annotations meet quality standards and contribute effectively to the project goals.
Accuracy and Precision
- Follow Object Edges Precisely: Masks should accurately follow the actual edges of objects, not approximate them
- Handle Occlusions Correctly: When objects are partially hidden, label only the visible portion
- Avoid Overlapping: Unless project guidelines specify otherwise, masks should not overlap
- Complete Coverage: Ensure all required objects in the image are labeled
- Correct Labels: Always assign the most accurate label available
Consistency
- Uniform Style: Maintain consistent labeling style throughout the project
- Same Objects, Same Labels: Use the same label for the same type of objects
- Edge Precision: Maintain consistent level of edge precision across all masks
- Follow Guidelines: Consistently apply project guidelines to all images
Efficiency
- Use Appropriate Tools: Choose the fastest tool that still meets accuracy requirements
- Batch Similar Objects: When possible, label similar objects in sequence to maintain rhythm
- Learn Shortcuts: Master keyboard shortcuts to speed up your workflow
- Organize Workflow: Develop a systematic approach to labeling each image
Quality Control
- Review Before Submission: Always review your work before submitting
- Check All Masks: Verify that all masks are correctly drawn and labeled
- Verify Completeness: Ensure all required objects are labeled
- Test Zoom Levels: Check your work at different zoom levels to catch edge issues
- Compare with Guidelines: Regularly compare your work with project examples
5. Common Challenges and Solutions
Challenge: Complex Object Boundaries
Problem: Objects with very complex or unclear boundaries are difficult to label accurately.
Solutions:
- Zoom in significantly to see edge details
- Use polygon tool with many closely-spaced points
- Refer to project guidelines for edge cases
- Use auto segment as a starting point, then refine manually
Challenge: Overlapping Objects
Problem: Objects that overlap or are very close together are hard to separate.
Solutions:
- Zoom in to see separation points clearly
- Draw masks carefully, stopping at actual object boundaries
- Use polygon tool for precise control
- Refer to project guidelines for handling overlaps
Challenge: Small Objects
Problem: Very small objects are difficult to label accurately.
Solutions:
- Zoom in significantly before labeling
- Use polygon tool for precision
- Take your time—small objects require careful attention
- Verify accuracy by zooming out to check context
Challenge: Unclear Object Boundaries
Problem: Some objects have blurry or unclear edges.
Solutions:
- Use your best judgment based on project guidelines
- Look for context clues (shadows, lighting, adjacent objects)
- Maintain consistency with how you handle similar cases
- Ask project administrators for clarification if needed
6. Troubleshooting
Issue: Tool Not Responding
Solution:
- Check if you're in the correct mode (some tools require specific modes)
- Try clicking the tool icon again
- Refresh the page if the issue persists
- Check if there are any error messages
Issue: Mask Not Closing
Solution:
- Ensure you've placed at least 3 points
- Try pressing Enter to close
- Click on the first point to close manually
- Check if you're in the correct drawing mode
Issue: Label Not Applying
Solution:
- Ensure the mask is complete (closed polygon or finished rectangle)
- Verify you've selected a label from the list
- Try clicking the label again
- Check if the mask is selected
Issue: Can't See Mask
Solution:
- Check if mask visibility is toggled on
- Verify the mask was actually created (check the mask list)
- Adjust zoom level—mask might be outside current view
- Check layer visibility settings