Segmentation Reviewer Guide
This comprehensive guide provides detailed instructions for reviewers working on semantic segmentation projects. As a reviewer, your role is critical in maintaining high-quality annotations by evaluating annotator work, identifying errors, and providing constructive feedback.
Overview
The reviewer interface is designed to help you efficiently evaluate segmentation annotations while maintaining accuracy and consistency. This guide covers:
- Accessing the Reviewer Interface: How to navigate to the review screen
- Understanding the Interface: Key features and tools available
- Review Process: Step-by-step workflow for evaluating annotations
- Best Practices: Tips for efficient and accurate reviews
- Quality Standards: What to check and how to make decisions
1. How to Access the Reviewer Screen
Access to the reviewer interface is restricted to users who have been officially approved as reviewers for a specific project. You cannot access the review screen unless you have been assigned the Reviewer role.
Prerequisites
Before accessing the reviewer screen, ensure:
- You have been officially approved as a Reviewer for the project
- You have completed any required reviewer training or orientation
Step-by-Step Access Instructions
-
Navigate to My Projects:
- Log into your TagOn account
- Click on "Projects" in the main navigation menu
- Select "My projects" from the dropdown or sidebar
-
Locate Your Reviewer Project:
- Browse through your project list
- Find the project where your role is listed as "Reviewer"
-
Open the Project:
- Click on the project name
- The project detail page will display
- Look for the "Reviewer" tab in the project interface
- Click on the "Reviewer" tab to switch to review mode

2. Main Interface & Key Features
Understanding the reviewer interface layout is essential for efficient and accurate reviews. The interface is designed with all necessary tools and information easily accessible.
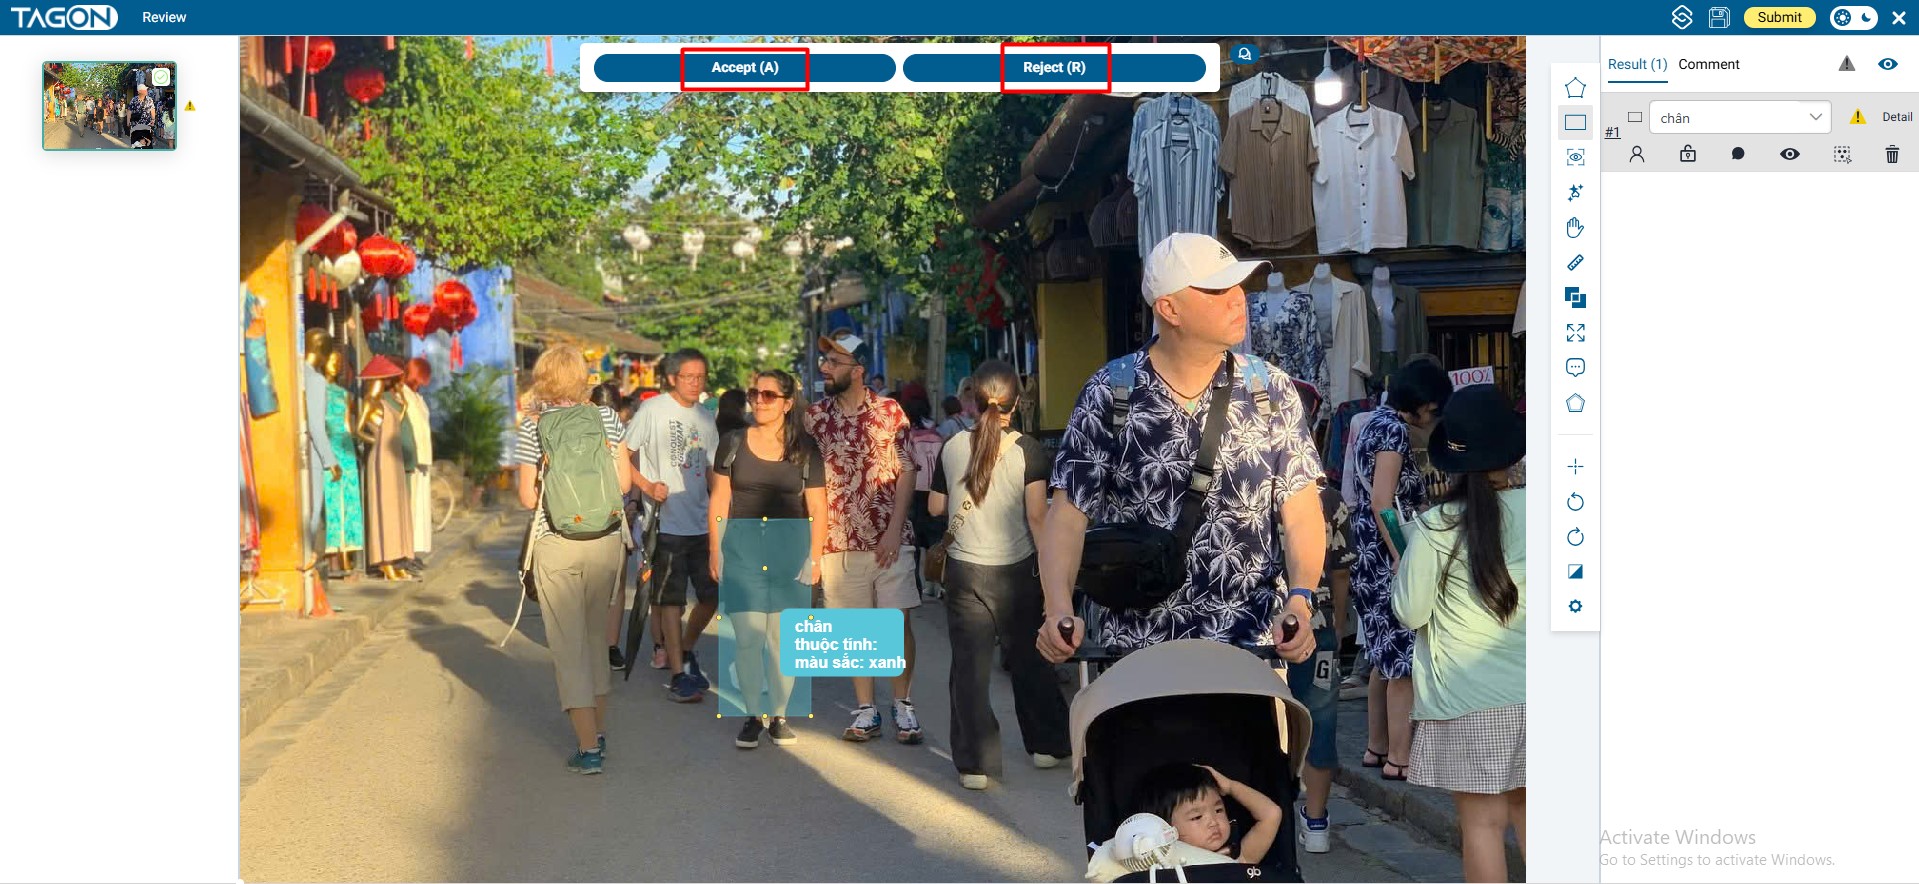
Center Panel: Annotation Display
The center of the screen displays the large image that has been labeled by the annotator:
- Full Resolution View: The image is displayed at high resolution for detailed inspection
- Zoom and Pan: Use zoom controls to inspect annotations at pixel level
- Mask Overlay: All segmentation masks are displayed with color-coded overlays
- Label Visualization: Each mask shows its assigned label and attributes
Action Buttons: Accept and Reject
Two primary action buttons control your review decisions:
Accept Button (Keyboard Shortcut: A):
- Purpose: Approve annotations that are 100% correct
- When to Use: Only when the annotation meets all quality standards:
- All required objects are labeled
- All labels are correct
- All attributes are accurate
- Annotations are precise and properly positioned
- Action: Click Accept button or press A on your keyboard
- Result: The annotation is approved and the annotator receives credit
Reject Button (Keyboard Shortcut: R):
- Purpose: Send annotations back for correction when any errors are found
- When to Use: When you identify even a single error or quality issue:
- Missing objects
- Incorrect labels
- Wrong attributes
- Imprecise or loose annotations
- Overlapping or shifted masks
- Action: Click Reject button or press R on your keyboard
- Result: The annotation is returned to the annotator with your feedback for correction
Right Sidebar: Tools and Object List
The right sidebar contains essential tools and information:
Labeling Tools:
- All annotation tools are available (bounding box, polygon, keypoint, etc.)
- You can use these tools to make minor corrections if needed
- Tools function the same way as in the annotator interface
Labeled Objects List:
- Complete Object Inventory: Shows a full list of all labeled objects in the current image
- Object Details: Each row displays:
- Object class/label name
- All assigned attributes (color, occluded status, pose, etc.)
- Object ID or identifier
- Quick Selection: Click any row in the list to instantly select and highlight that object in the image
- Edit Capability: Select objects to review, edit, or verify their properties
Benefits of the Object List:
- Quickly navigate to specific objects without searching the image
- Verify that all required objects are present
- Check attributes for each object systematically
- Identify missing or incorrectly labeled objects
Submit Button (Top-Right Corner)
Yellow Submit Button:
- Location: Top-right corner of the screen
- Purpose: Save your review decision and move to the next annotation
- Critical: You MUST click Submit to save your decision
- Action: After making your Accept/Reject decision, click Submit to finalize
- Result: Your decision is saved and you automatically move to the next image

Important: Your review decision is not saved until you click Submit. If you navigate away without submitting, your decision will be lost.
3. Standard Review Process for One Image
Follow this systematic 4-step process for each image to ensure thorough and consistent reviews.
Step 1: Thoroughly Check 4 Critical Points
Before making your decision, systematically verify these four critical aspects:
1.1. Completeness Check: Are ALL Required Objects Labeled?
- Review the Image: Carefully examine the entire image for all objects that should be labeled according to project guidelines
- Check Object List: Compare the objects in the sidebar list with what you see in the image
- Verify Requirements: Ensure all mandatory objects are present (e.g., all people, all vehicles, all signs)
- Look for Missing Objects: Check corners, edges, and partially visible objects that might have been missed
- Count Objects: If the project specifies a minimum number, verify the count matches
Common Issues to Watch For:
- Objects in the background that were overlooked
- Partially visible objects that should still be labeled
- Small objects that are easy to miss
- Objects at image edges or corners
1.2. Label Accuracy Check: Is the Class (Label) Correct for Each Object?
- Verify Each Label: Check that every object has the correct class/label assigned
- Compare with Guidelines: Ensure labels match project-specific definitions
- Check Similar Objects: Verify that similar-looking objects have consistent labels
- Review Edge Cases: Pay special attention to objects that could be misclassified
1.3. Attribute Accuracy Check: Are All Attributes Accurate?
- Review All Attributes: Check every attribute assigned to each object:
- Color attributes (if applicable)
- Occlusion status (occluded, partially occluded, fully visible)
- Pose or orientation (if applicable)
- Size or scale attributes
- Any other project-specific attributes
- Verify Accuracy: Ensure attributes match what you observe in the image
- Check Consistency: Verify that similar objects have consistent attribute assignments
1.4. Precision Check: Are Annotations Tight and Precise?
- Mask Boundary Accuracy: Verify that segmentation masks accurately follow object edges
- Check for Loose Annotations: Ensure masks aren't significantly larger than the actual object
- Verify Positioning: Check that masks are correctly positioned and not shifted
- Overlap Detection: Identify any masks that incorrectly overlap with other objects
- Edge Precision: Verify that mask edges follow object boundaries precisely (not cutting off parts or including background)
Common Issues to Watch For:
- Masks that include 10-20% or more of background pixels
- Masks that are too small and cut off parts of objects
- Masks that are shifted from the actual object position
- Overlapping masks where objects don't actually overlap
- Rough or jagged edges that don't follow smooth object boundaries
Step 2: Make Your Decision Instantly
After completing your four-point check, make your decision immediately:
If Perfect in Every Way:
- All required objects are labeled
- All labels are correct
- All attributes are accurate
- All annotations are tight and precise
- Action: Press A (Accept) or click the green Accept button
If Even One Small Mistake is Found:
- Any missing objects
- Any incorrect labels
- Any wrong attributes
- Any imprecise annotations
- Action: Press R (Reject) or click the red Reject button
Decision Guidelines:
- Be Consistent: Apply the same standards to all annotations
- Be Fair: Don't reject for minor issues that don't affect quality
- Be Thorough: Don't accept if you have any doubts
- Be Objective: Base decisions on project guidelines, not personal preferences
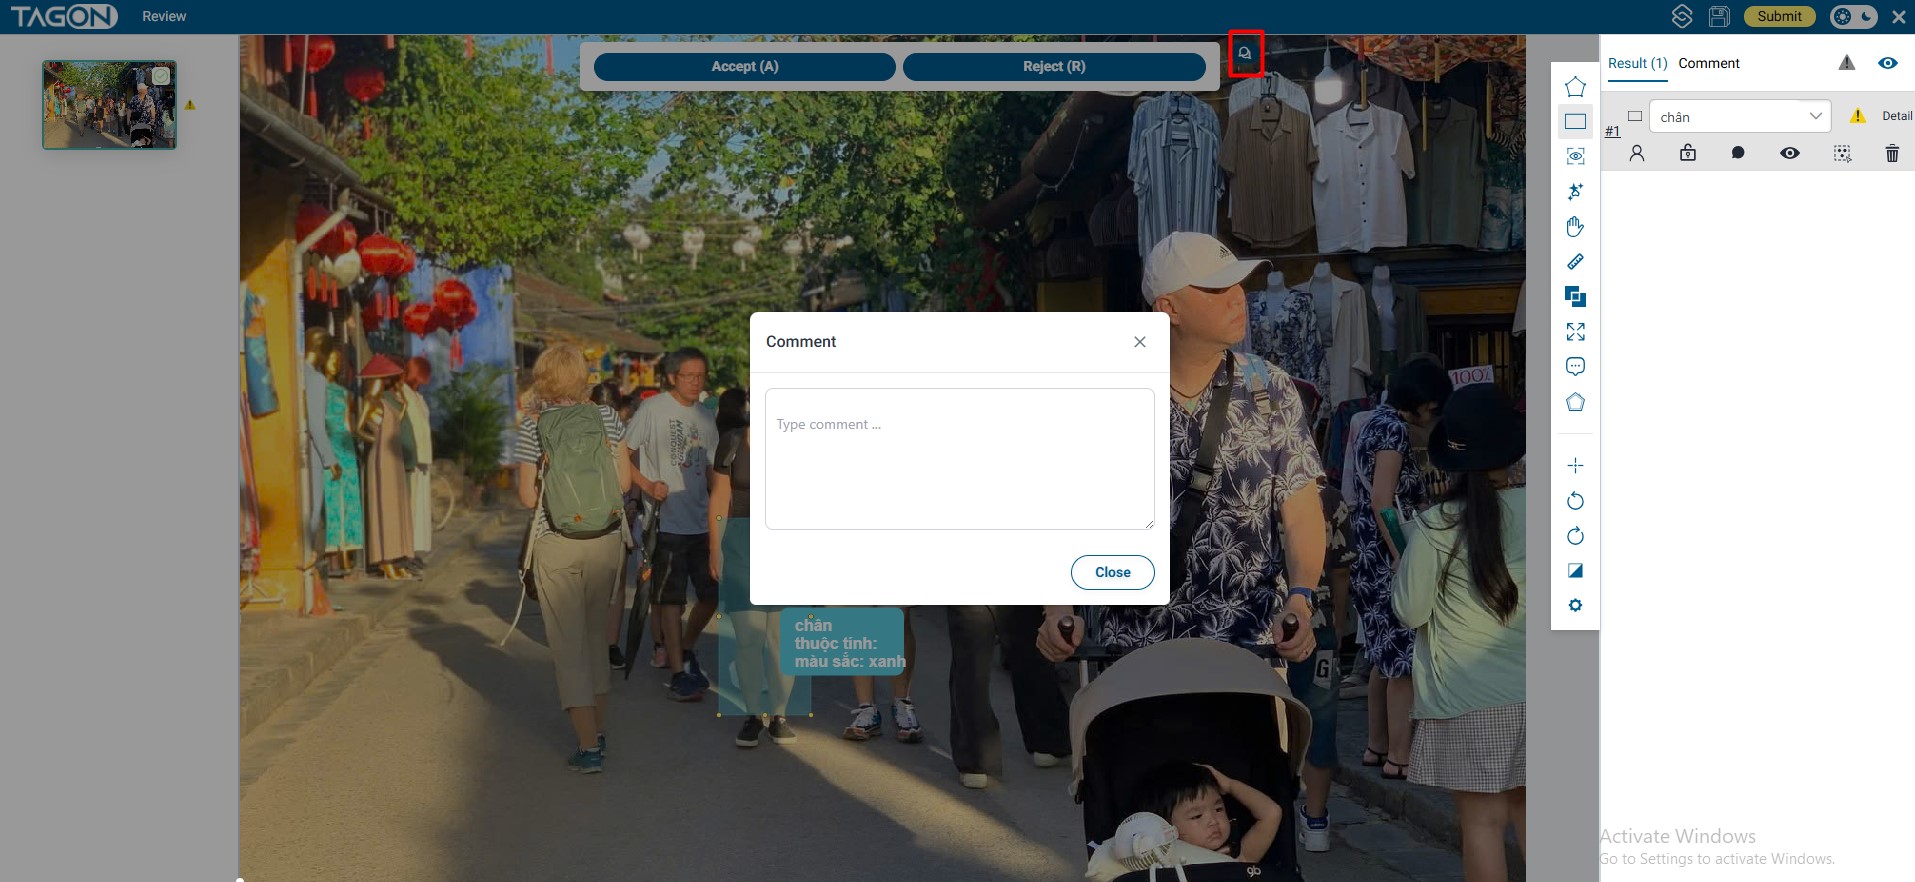
Step 3: Write Clear Comments (If Rejecting)
If you reject an annotation, you MUST write a crystal-clear comment explaining what needs to be fixed. Good feedback helps annotators understand and correct their mistakes.
Writing Effective Rejection Comments
Characteristics of Good Comments:
- Specific: Clearly identify what is wrong
- Actionable: Tell the annotator exactly what to fix
- Location-Specific: Indicate where in the image the issue is
- Quantitative When Possible: Use numbers or percentages when relevant
- Professional: Maintain a constructive, helpful tone
Comment Best Practices:
- Write comments immediately after rejecting
- Be specific about location (use directional terms: top-left, center, bottom-right)
- Include numbers when helpful (e.g., "3 people", "15% background")
- Reference the object list when applicable (e.g., "Object #5 in the list")
- Provide enough detail for the annotator to fix the issue without guessing
Step 4: Submit and Move to Next Image
- Review Your Decision: Double-check that you've made the correct choice
- Verify Comments: If you rejected, ensure your comment is clear and complete
- Click Submit: Click the yellow Submit button in the top-right corner
- Automatic Navigation: The system automatically moves you to the next image
- Repeat Process: Continue with the same 4-step process for the next annotation
Important: Always click Submit before moving to the next image. Your decision is not saved until you submit.
4. Pro Tips for Lightning-Fast & Accurate Review
These tips will help you review more efficiently while maintaining high accuracy:
Keyboard Shortcuts
Essential Hotkeys:
- A = Accept (saves time compared to clicking the button)
- R = Reject (instant rejection without mouse movement)
Benefits:
- Significantly faster than using the mouse
- Reduces repetitive strain
- Allows you to maintain focus on the image
- Can save 2-3 seconds per image, which adds up over hundreds of reviews
Practice: Use keyboard shortcuts consistently to build muscle memory and increase speed.
Zoom for Precision
Always Zoom to 200-300%:
- Why: Pixel-level inspection reveals issues that aren't visible at 100% zoom
- When: Always zoom in when checking mask boundaries and edge precision
- How: Use zoom controls or keyboard shortcuts to zoom in on areas of interest
- What to Check:
- Mask edges for background pixel inclusion
- Small objects that might be missed
- Overlapping areas between objects
- Attribute accuracy (colors, details)
Zoom Workflow:
- Start at 100% for overall assessment
- Zoom to 200-300% for detailed boundary checks
- Pan around the image to check all areas
- Zoom back out to verify overall composition
Use the Object List for Navigation
Click Objects in the Right Sidebar:
- Quick Selection: Click any row in the object list to instantly jump to and select that object
- Efficient Navigation: No need to search the image for specific objects
- Systematic Review: Go through the list methodically to ensure nothing is missed
- Verification: Use the list to verify that all visible objects are accounted for
Workflow Tip: Review the object list first to get an overview, then click through each object to verify its accuracy.
Additional Efficiency Tips
- Develop a Routine: Follow the same review pattern for every image to build consistency
- Take Short Breaks: Review quality decreases with fatigue - take breaks to maintain accuracy
- Use Tools When Needed: Don't hesitate to use editing tools for minor corrections if appropriate
- Batch Similar Images: When reviewing similar images, maintain consistent standards
- Document Patterns: Note recurring issues to help improve project guidelines
5. Final Checklist Before Hitting Submit
Before clicking the Submit button, quickly verify these points:
Pre-Submit Verification
- All Objects Present: Have I verified that all required objects are labeled?
- Correct Class: Are all labels/classes correct for each object?
- Correct Attributes: Are all attributes (color, occlusion, pose, etc.) accurate?
- Annotations Tight & Precise: Are all masks properly positioned with tight boundaries?
- Clear Comment (if Reject): If I rejected, is my comment specific and actionable?
Quick Quality Check
- Have I zoomed in to check precision?
- Have I checked all areas of the image (corners, edges, background)?
- Have I verified the object list matches what I see?
- Is my decision consistent with project guidelines?
- Am I confident in my decision?
Remember: It's better to take an extra moment to verify than to submit an incorrect decision. However, don't overthink - trust your systematic review process.
Summary: Efficient Review Workflow
One-Line Summary for Pros:
Inspect 4 points → A or R → Detailed comment (if R) → Submit → Next → Repeat
The Complete Cycle:
- Inspect the 4 critical points (completeness, labels, attributes, precision)
- Decide instantly: Accept (A) if perfect, Reject (R) if any errors
- Comment clearly if rejecting (specific, actionable feedback)
- Submit to save your decision
- Next image loads automatically
- Repeat the process for consistent, high-quality reviews
Success Factors:
- Consistency: Apply the same standards to every image
- Efficiency: Use shortcuts and systematic processes
- Accuracy: Zoom in, check thoroughly, verify everything
- Communication: Write clear, helpful feedback when rejecting
- Speed: Develop a routine that balances speed and quality
By following this guide and developing your review routine, you'll become an efficient and effective reviewer who maintains high quality standards while maximizing productivity.