Add Dataset to Project
This guide provides instructions on how to add datasets to your labeling projects. Datasets are collections of data files (images, text files, or other media) that need to be labeled by annotators. You can add datasets to both new projects and existing projects.
Adding Dataset to a New Project
After creating a new project, follow these steps to add your first dataset:
Step 1: Navigate to Project Data Section
- Go to your Projects page
- Select the project where you want to add data
- Click on the Data tab or section in the project
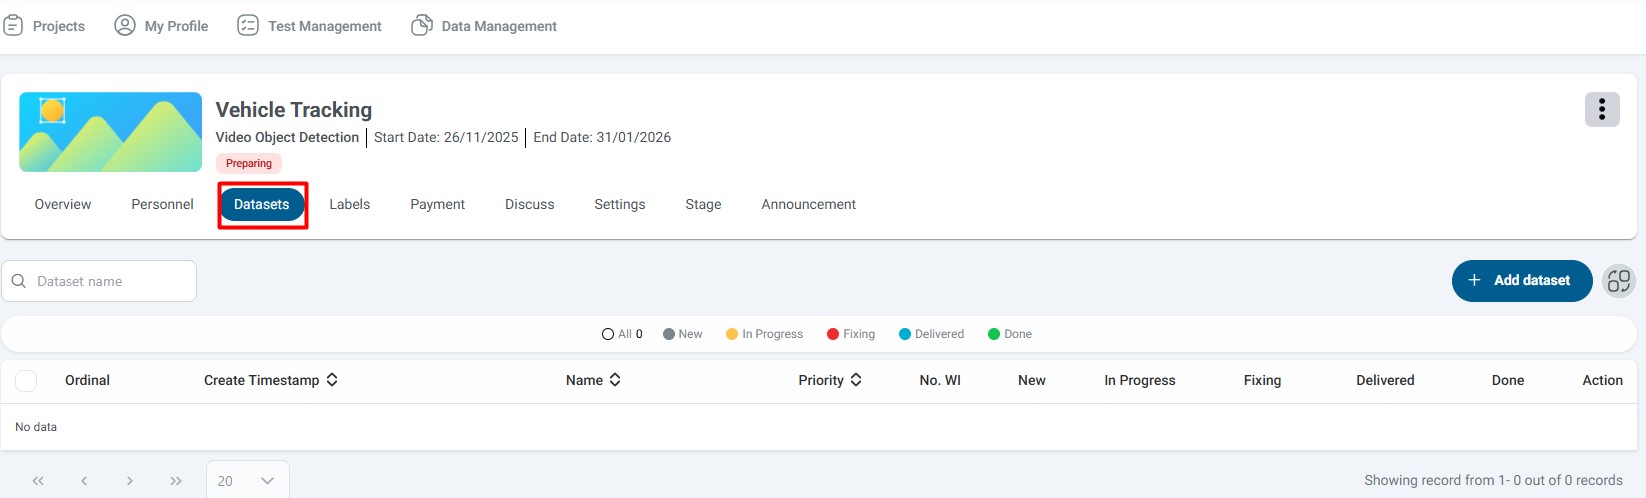
Look for the Datasets section. If no data exists, this section will be marked in red, indicating you need to add datasets before labeling can begin.
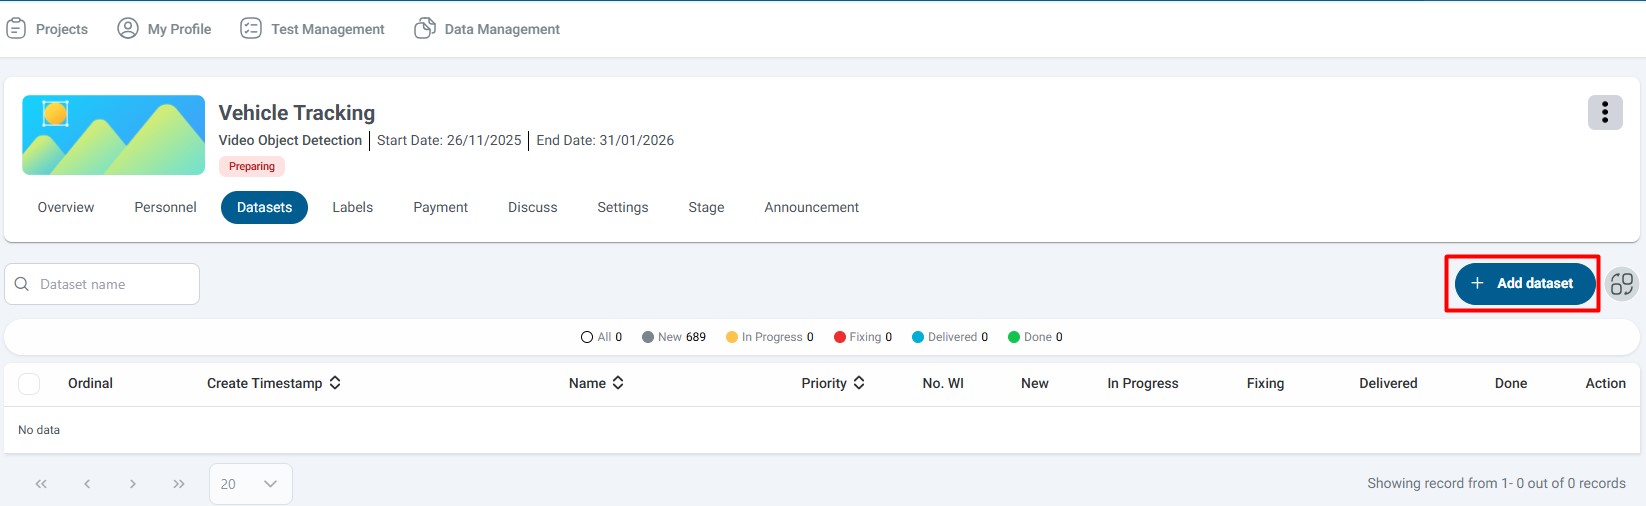
Step 2: Add Your First Dataset
- Click the Add dataset button
- A file selection dialog will open where you can:
- Browse your local file system
- Select single or multiple files
- Choose from supported file formats
- Ensure your files meet the project's format requirements
- Check file size limits before uploading
- Verify that files are properly formatted and readable
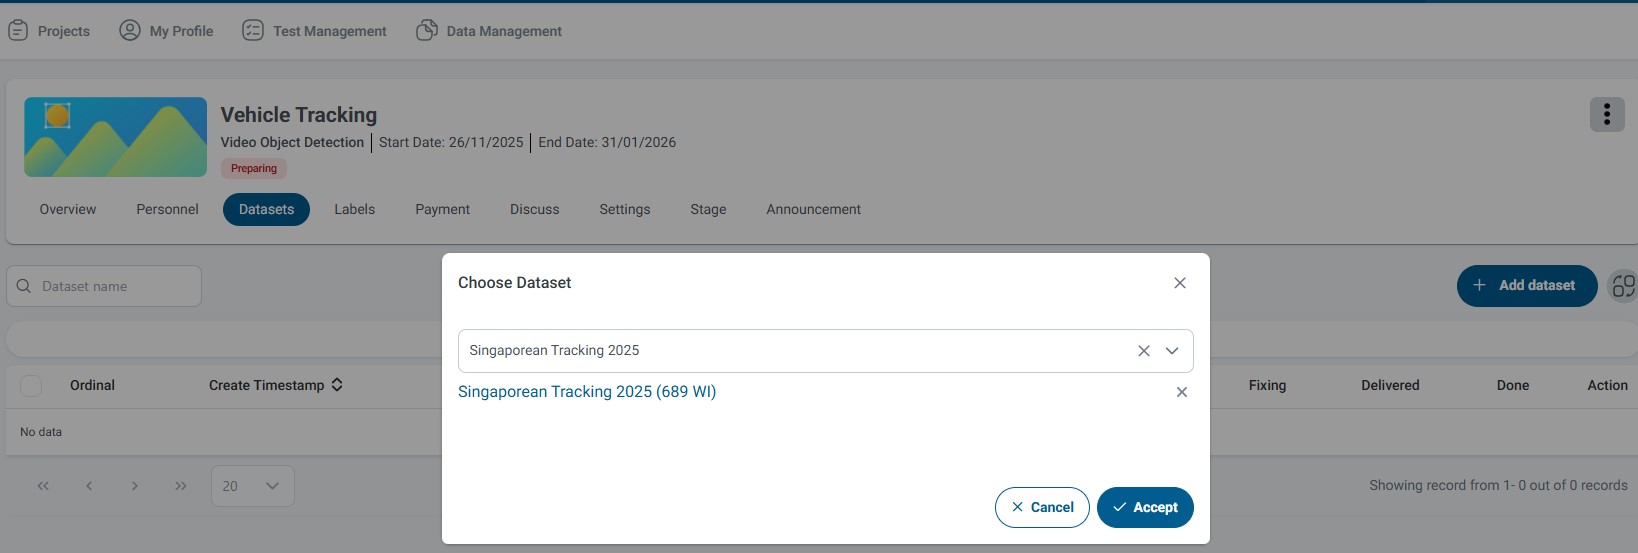
Step 3: Choose or Create Dataset Name
After selecting your files, you'll be prompted to name your dataset:
- If you have existing datasets prepared, select from the dropdown list
- Or create a new dataset by entering a name
- Use descriptive names that indicate content or purpose
- Include version numbers if uploading multiple versions (e.g., "Dataset_v1", "Dataset_2024_01")
- Use consistent naming conventions across all datasets
- Avoid special characters that might cause issues
Options:
- Click Yes to confirm and proceed with adding the data
- Click No to cancel and return to the previous screen
The actual cost may vary slightly based on final processing results, but the estimate should be very close to the final amount.
Step 5: Upload Confirmation
Once the data is successfully uploaded, you will receive an automated email confirmation containing:
- Data file name: Name of the uploaded file(s)
- Number of sentences uploaded: Total count of processed data items
- Number of sentences created: Count of unique items successfully added
- Number of duplicate sentences: Count of items rejected due to duplication
Save the email for your records. Use it to verify the upload completed successfully and reference it if you need to contact support.
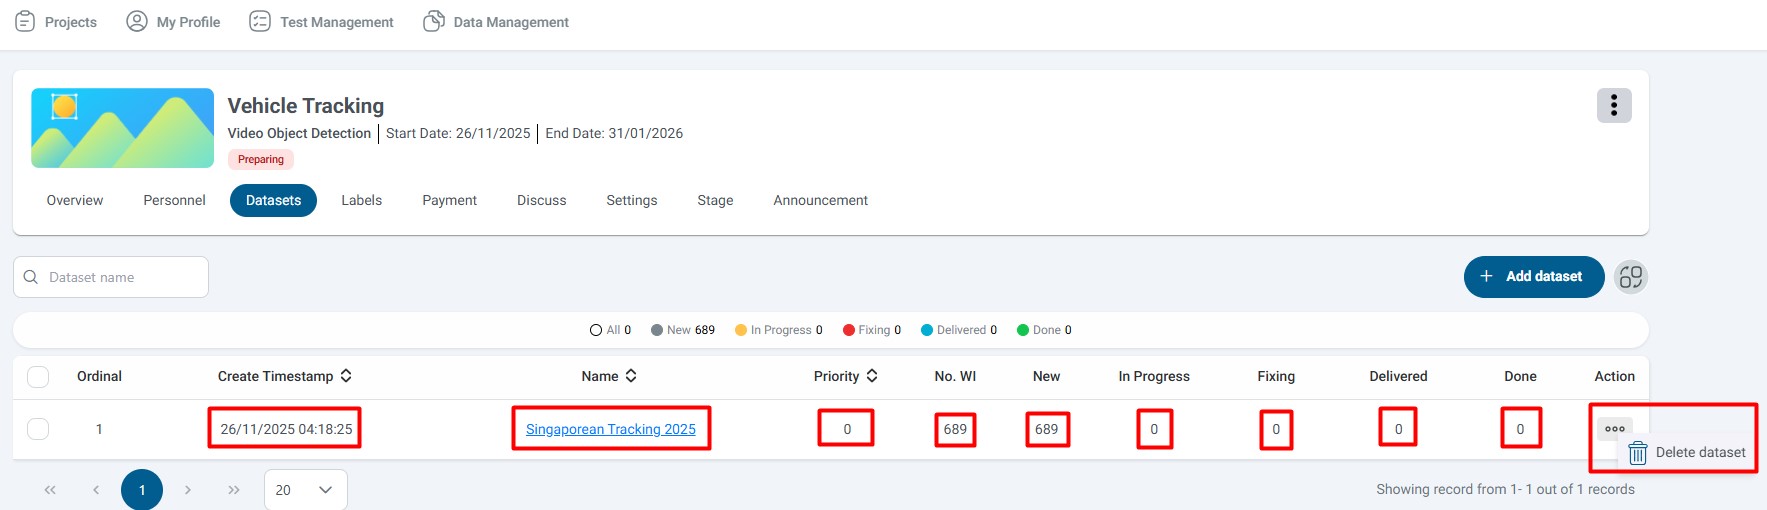
Step 6: View Dataset Details
After receiving the confirmation email, return to the project dashboard to view detailed information about your uploaded dataset.
In the Data section, you can view comprehensive statistics about your dataset:
| No. | Field Name | Description |
|---|---|---|
| 1 | Creation Timestamp | Date and time when the dataset was created and uploaded |
| 2 | Dataset Name | Name assigned to the dataset during upload |
| 3 | Priority | Priority order for processing (higher priority processed first) |
| 4 | No.WI | Total number of Work Items (WI) in the dataset |
| 5 | New | Number of work items waiting to be assigned |
| 6 | In Progress | Number of items currently being labeled |
| 7 | Fixing | Number of items returned for correction |
| 8 | Delivered | Number of completed items ready for review |
| 9 | Done | Number of fully completed and approved items |
| 10 | Delete dataset | Action button to delete the entire dataset |
Understanding the Statistics:
- Monitor progression: New → In Progress → Delivered → Done
- Use "Fixing" count to identify quality issues
- The sum of all status counts should equal the total "No.WI" count
Managing Dataset Content
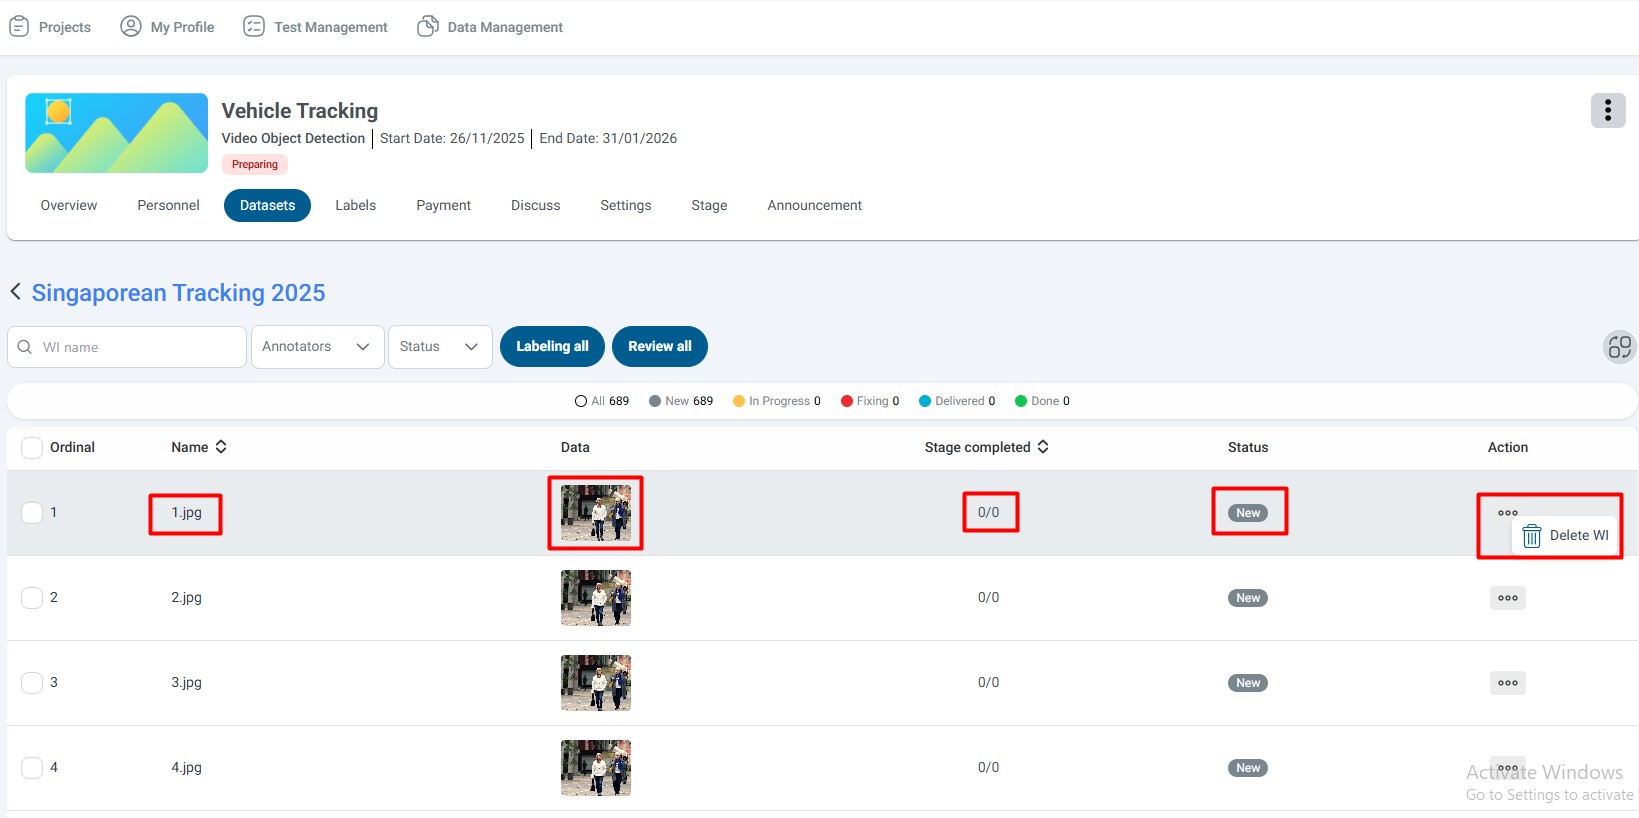
View Individual Work Item Details
To view detailed information about individual work items within your dataset:
- Click the View Details icon next to the dataset entry
- A detailed view will open showing all work items
Details View Fields:
| No. | Field Name | Description |
|---|---|---|
| 1 | Image Name | Unique identifier or filename of the data item |
| 2 | Data | Preview or thumbnail of the actual image/data |
| 3 | Stage completed | Number of labeling stages completed |
| 4 | Status | Current status (New, In Progress, Delivered, Done, Fixing) |
| 5 | Delete WI | Action button to delete this specific Work Item |
Additional Features:
- Filter work items by status, annotator, or other criteria
- Search for specific items by name or identifier
- Select multiple items for batch operations
- Export lists or reports of work items
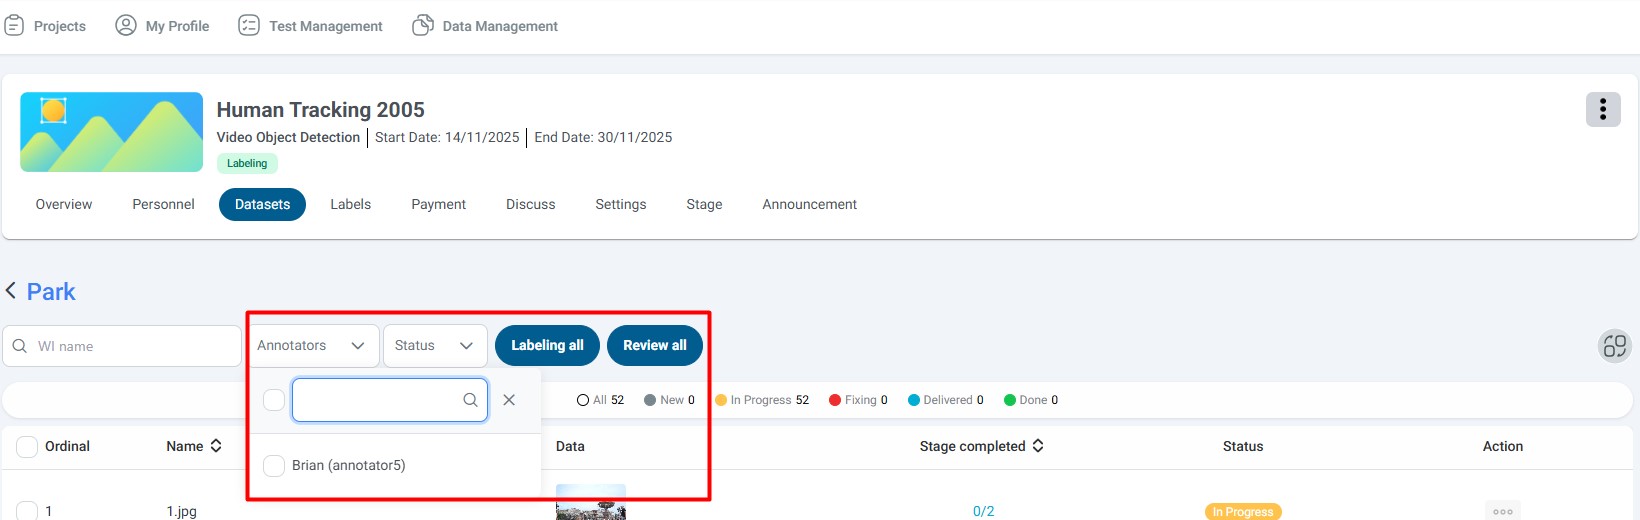
View Data by Labeler (Annotator)
Filter and view work items based on which annotator is assigned or has worked on them.
How to filter by labeler:
- Navigate to the dataset details view
- Locate the Filter by Labeler section (sidebar or dropdown menu)
- Select the annotator's name
- The view will update to show only work items for that annotator
Use Cases:
- Quality control: Review work completed by specific annotators
- Performance monitoring: Track individual annotator productivity
- Workload management: Ensure balanced work distribution
- Issue resolution: Identify and address problems with specific annotators' work
Deleting Datasets and Work Items
Deleting an Entire Dataset
To remove an entire dataset from your project:
- Navigate to the dataset overview section
- Locate the dataset you want to delete
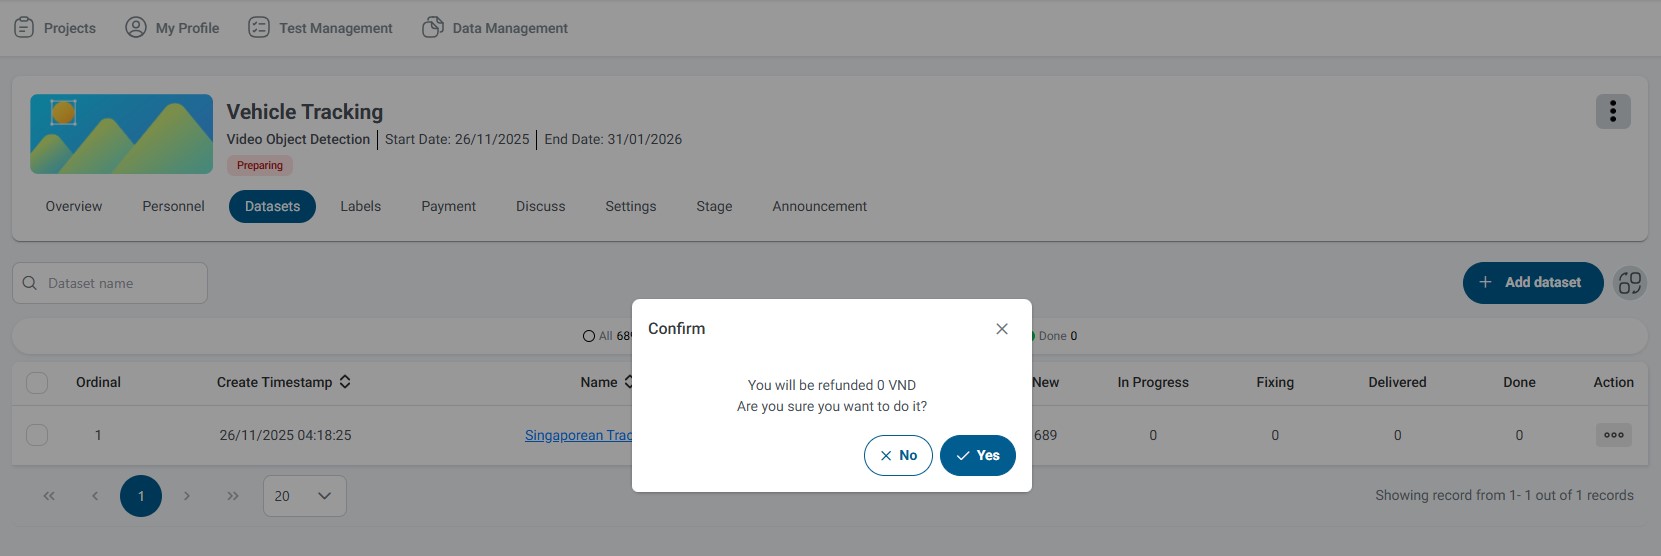
- Click the Delete Dataset icon (trash can symbol)
- Confirm the deletion when prompted
Refund Policy:
- Upon successful deletion, the previously calculated cost will be automatically refunded
- Refund amount matches the original cost charged during upload
Deletion Restrictions:
- You can only delete datasets that are newly uploaded and not yet labeled
- If work items have been assigned, started, or completed, deletion may be restricted
- Datasets in active labeling workflows may have deletion limitations
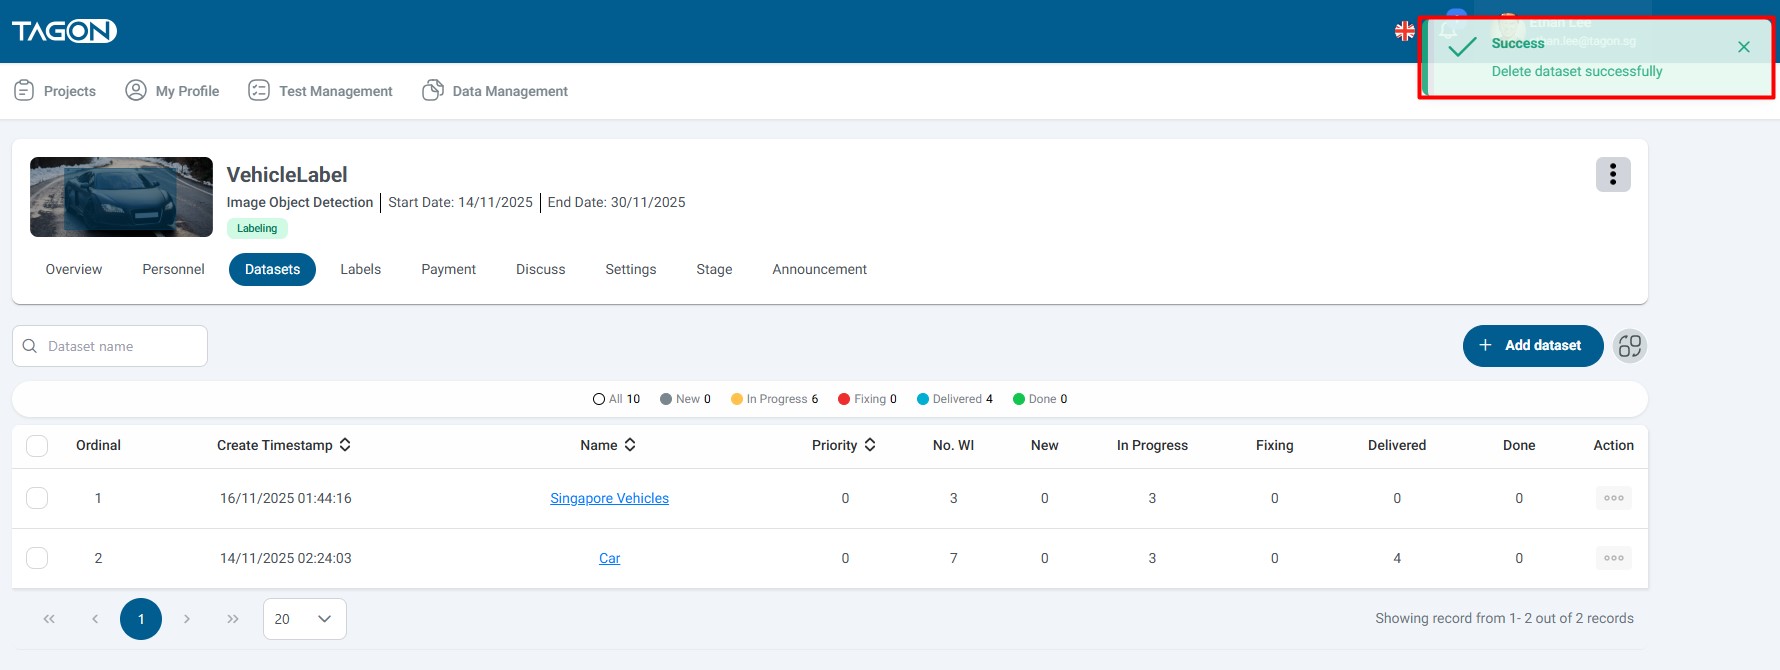
What Happens When You Delete:
- All work items within the dataset are removed
- Associated costs are refunded
- Dataset is permanently removed from the system (may be irreversible)
- Any assignments to annotators are automatically cancelled
Before Deleting:
- Verify no annotators are currently working on items in the dataset
- Ensure you have a backup of the data if needed
- Confirm deletion is necessary and cannot be resolved through other means
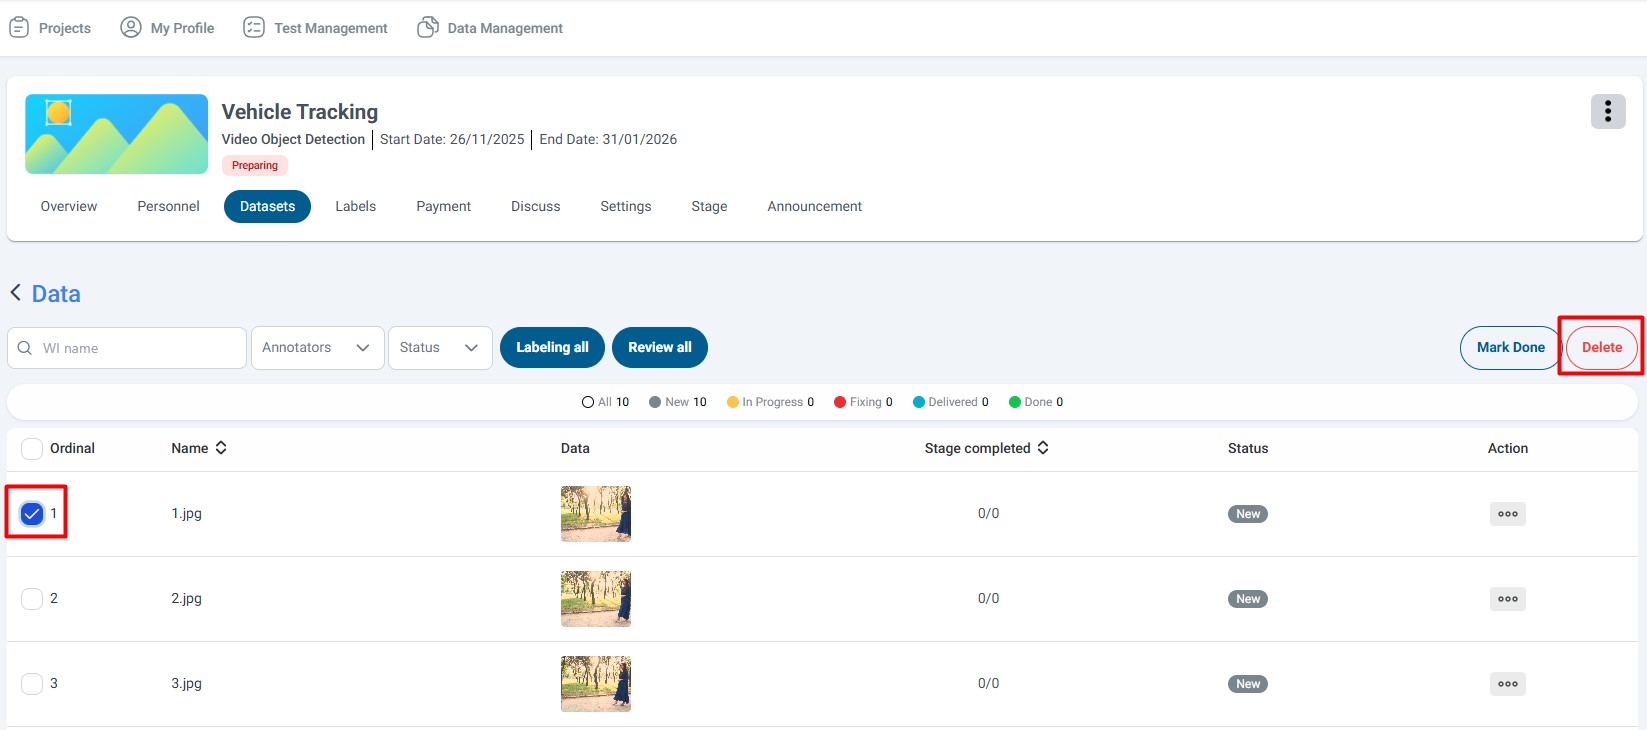
Deleting Individual Work Items
To remove specific items from a dataset:
- Click View Details to see all work items in the dataset
- Select the item you want to delete
- Click the Delete icon associated with that item
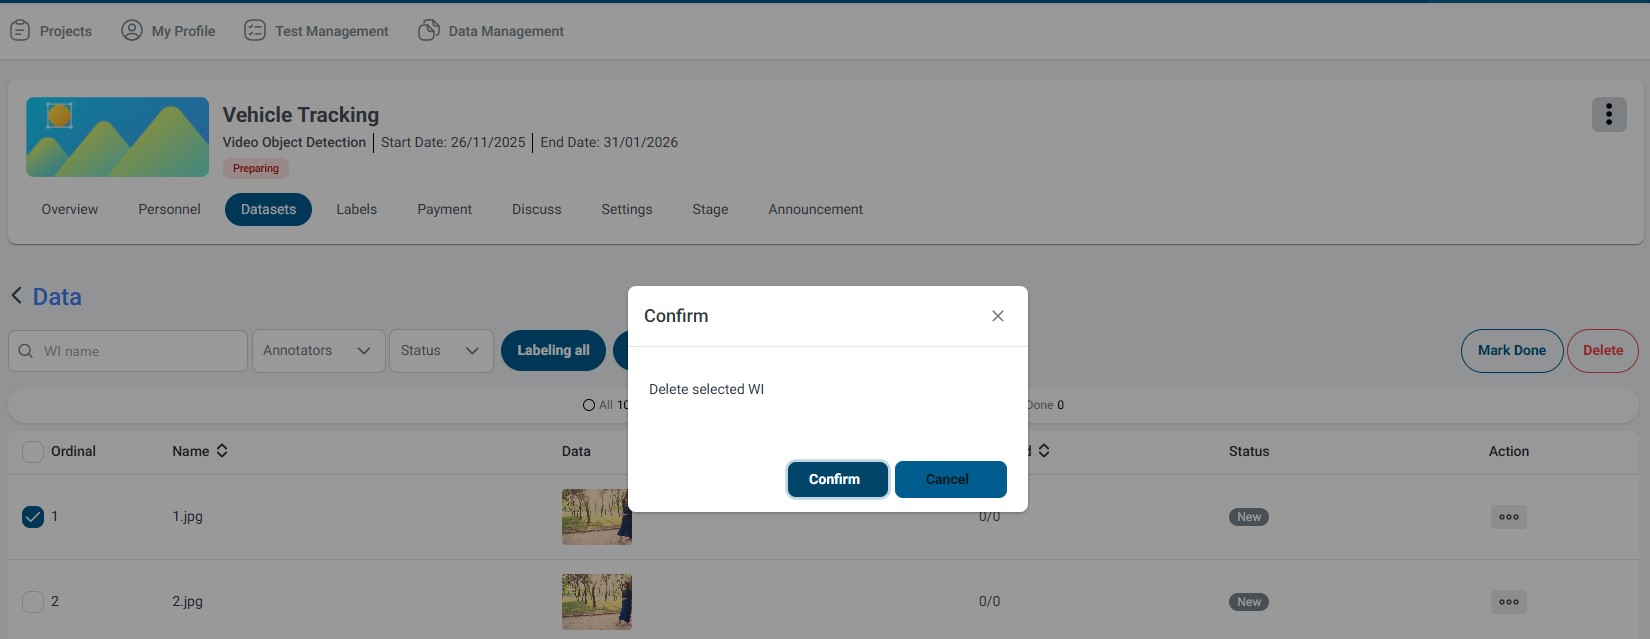
- Review the refund amount displayed
- Confirm the deletion action
- Refund amount represents the cost returned for that specific work item
- Refunds are calculated proportionally based on the original dataset cost
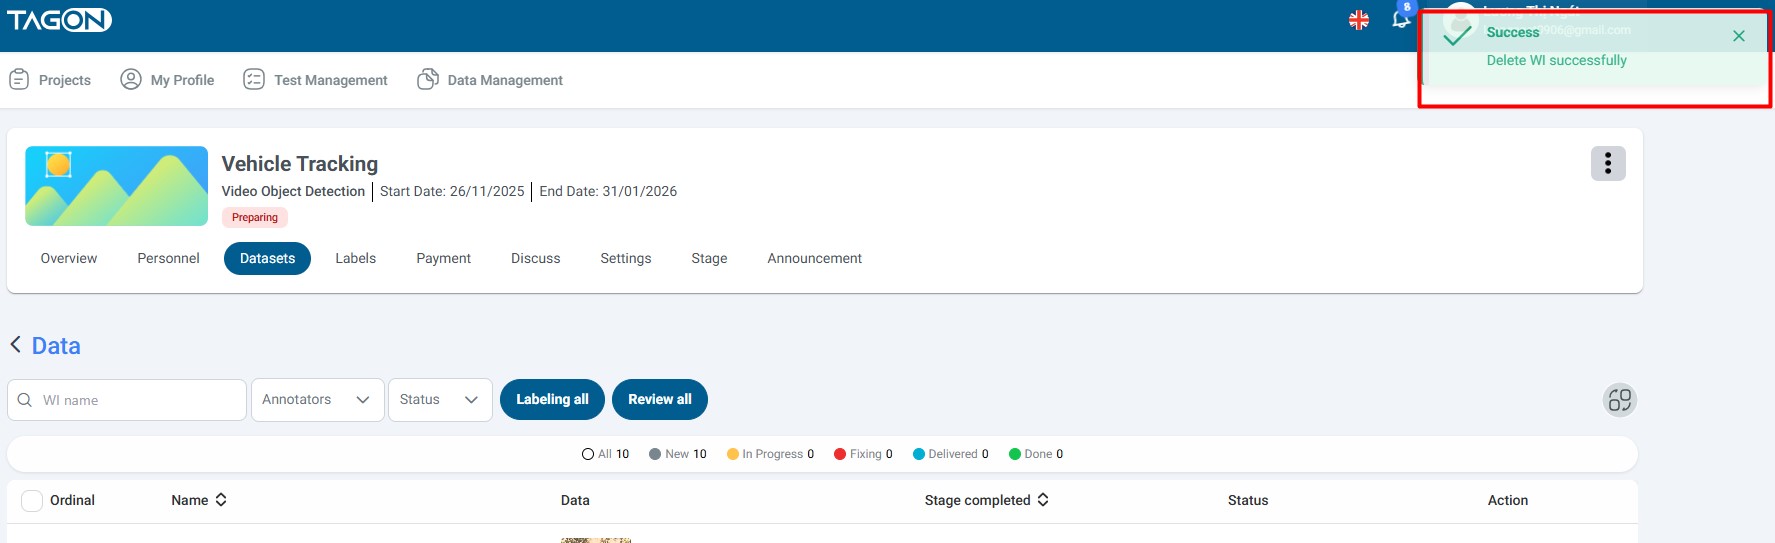
- Refund is automatically processed and added to your account balance
Deletion Requirements:
- Work items must be newly uploaded and unlabeled
- Items assigned to annotators or with labeling progress cannot be deleted
- Items in completed or delivered batches may have deletion restrictions
Use Cases:
- Remove duplicate or incorrect items accidentally uploaded
- Clean up test data included in the dataset
- Remove items that don't meet quality standards
- Adjust dataset size by removing unnecessary items
Adding Dataset to a Project with Existing Data
When your project already contains datasets, you can add additional datasets following similar steps with some important differences.
Step 1: Access Dataset Overview
Navigate to the Dataset overview section. You'll see:
- List of all uploaded datasets
- Current status and progress for each dataset
- Options to manage existing datasets
- The Add Data button for adding new datasets
Step 2: Add New Dataset
Click the Add Data icon (button, plus sign, or "Add Dataset" link) to begin uploading a new dataset.
The upload process follows the same steps:
- Select your data files
- Name your dataset
- Review estimated costs
- Confirm the upload
Step 3: Handle Duplicate Data Detection
When adding datasets to an existing project, the system automatically checks for duplicate data items across all datasets.
What happens with duplicates:
- Automatic Detection: System scans your new dataset against all existing datasets
- Error Prevention: If duplicates are detected, the upload process will be blocked
- Error Message: You'll receive a clear message indicating duplicate data was found
- Upload Blocked: New data cannot be uploaded until duplicates are resolved
- The system compares data items based on content, not just filenames
- Exact matches and near-duplicates may be flagged
- Duplicate detection helps maintain data quality and prevents redundant labeling
How to resolve duplicate issues:
- Review the Error Message: Check which items are duplicates
- Remove Duplicates: Clean your dataset by removing duplicate items
- Verify Data: Double-check you're not accidentally re-uploading existing data
- Re-attempt Upload: Try uploading again after removing duplicates
- Naming Convention: Use consistent naming (e.g., "Dataset_v1", "Dataset_v2", "Dataset_2024_01")
- Version Control: Keep track of which datasets contain which data
- Incremental Uploads: Consider uploading in smaller batches for better management
- Documentation: Maintain records of what each dataset contains
Step 4: Post-Upload Verification
After successfully adding a new dataset:
- Verify Upload: Confirm the new dataset appears in your dataset list
- Review Statistics: Check that work item counts match expectations
- Check Costs: Review updated cost calculations
- Monitor Progress: Track how the new dataset progresses through the labeling workflow
Managing Multiple Datasets:
- Priority Settings: Adjust priorities if certain datasets should be processed first
- Status Monitoring: Track progress of each dataset independently
- Bulk Operations: Some operations allow managing multiple datasets simultaneously
Additional Considerations
Workflow Integration
- New datasets are automatically integrated into your existing project workflow
- Annotators assigned to the project can access items from all datasets
- Progress tracking works across all datasets in the project
Cost Management
- Each new dataset adds to your total project cost
- Review cost estimates before confirming each upload
- Monitor your overall project budget as you add more datasets
Quality Assurance
- Maintain consistency across datasets to ensure labeling quality
- Use similar data formats and structures when possible
- Consider dataset organization strategies for large projects
Summary
Quick Checklist for Adding Datasets:
- Navigate to project overview
- Click "Add dataset" button
- Select files from your local system
- Choose or create dataset name
- Review estimated cost
- Confirm upload
- Verify email confirmation
- Check dataset details and statistics
Remember:
- Complete your dataset setup before starting labeling
- Monitor dataset statistics regularly
- Use consistent naming conventions
- Handle duplicates before uploading
- Keep track of costs and budgets